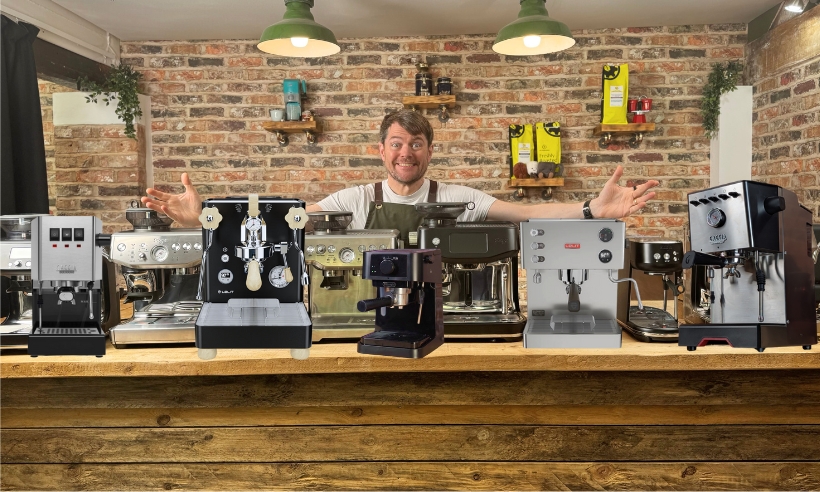
Best Espresso Machine UK 2025: Manual, Bean-to-Cup, Pod & Budget Picks
By Joelle HayesDecember 6, 202599 mins read1733 Views
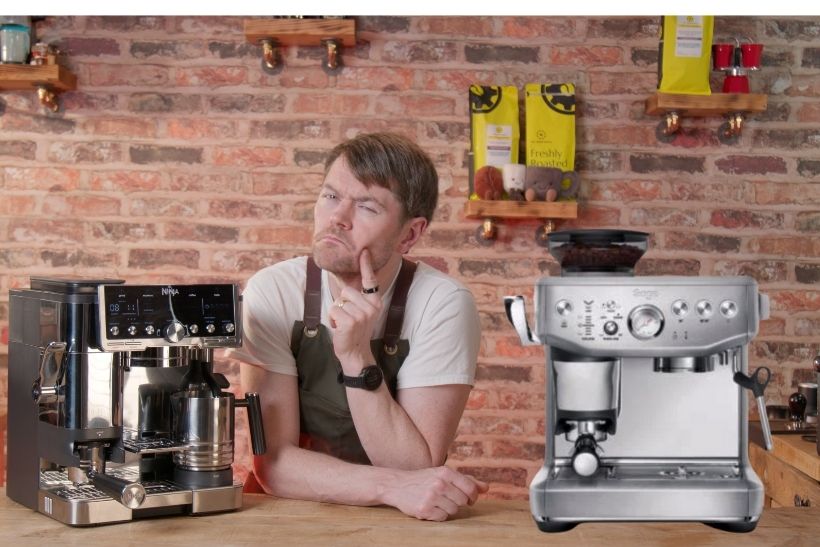
If you’re here, you want great espresso at home, maybe a smack-you-in-the-face double shot, maybe a silky flat white, or just a morning cup that doesn’t taste like melted car tyres. Here’s the truth nobody tells you at the start: there isn’t one “best” espresso machine, there’s only the best machine for you.
That’s why this article is the most comprehensive espresso machine guide known to humankind (seriously, it’s not short; I might have broken a record). Whether it’s your first espresso or you’re sitting on a stash of WDT tools and titanium burrs, I’ve got you covered. Beginners, seasoned home baristas, tight budgets, “sky’s the limit” spenders, lovers of push-button convenience, kitchen space misers, everyone’s in here.
And because no sane person reads 20,000 words of espresso nerdery cover to cover (though if you do, my mum and I will be very proud), I’ve added a handy menu up top so you can jump straight to the section that fits your vibe. There’s also a quick glossary and beginner tips to cut through the jargon, entitled “Great Espresso at Home: Dos & Don'ts” at the end of this post. Espresso folk do love their acronyms, don’t we?
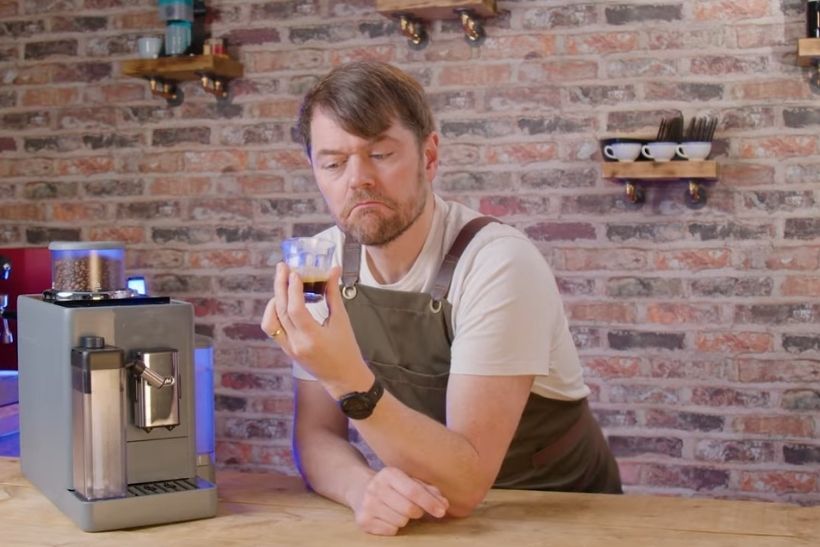
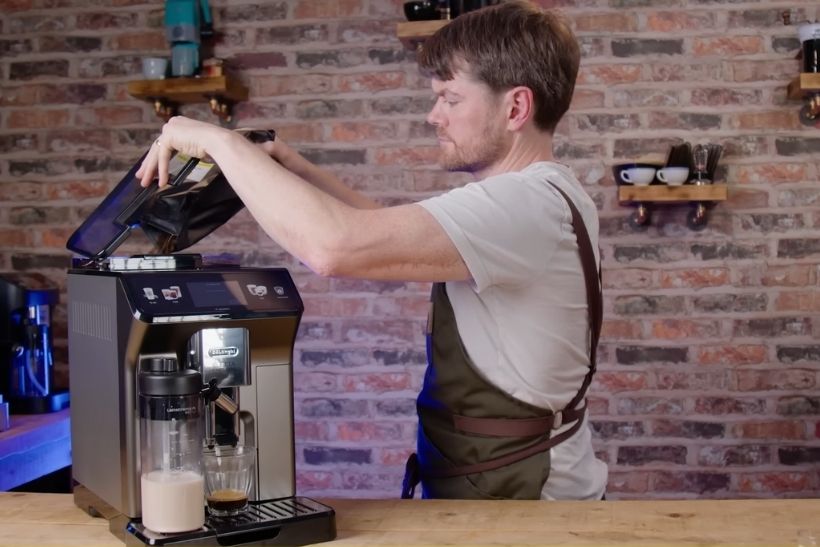
First time here? If so, welcome. I'm Kev, my full name is “Coffee Kev”, and I can usually be found messing about with coffee machines here at coffeeblog.co.uk, or on my YouTube channel: Coffee Kev YouTube channel. I also have a blog for our coffee-loving cousins across the pond at CoffeeKev.com. Last, but not least, I’m also the Founder and Director of Coffee at Cworks.co.uk, so if you’re after reasonably priced, very freshly roasted beans (usually roasted on the day of dispatch), now you know.
One quick thing to note: my reviews are 100% independent. I don’t take sponsorship deals or payment for ranking machines. Everything here is based on real testing. For every machine you see in this guide, you’ll find my own photos and a full YouTube review where I’ve put it properly through its paces.
If you want to go deeper into any particular style of espresso machine, each category and machine I feature in this article includes a link to a dedicated article with even more reviews and recommendations.
Right then, let’s get you sorted with the best espresso machine for you!
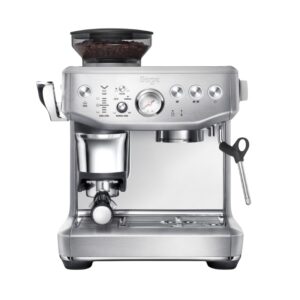
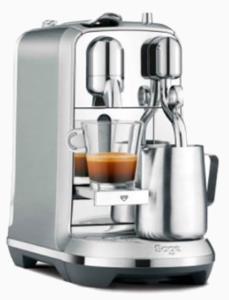
For: People who want real espresso with fewer faff points. Pros: Assisted dosing/tamping; auto-milk; keeps the portafilter workflow. Cons: Bigger footprint; pricier than entry-level manuals.
For: Convenience hunters seeking fresh-bean espresso at the push of a button. Pros: One-touch drinks; profiles; easy daily use. Cons: Espresso intensity is typically lower than that of a prosumer manual.
For: Tight spaces or travel setups. Pros: Tiny footprint or no power needed; quick heat-up. Cons: Smaller tanks/boilers; limited steaming power (or none).
Manual espresso machines are the true home-barista route, the kind where you control everything: grind size, dose, tamp, temperature, milk texture…the whole lot. They’re not press-and-go appliances, and they’re definitely not the right choice if you just want quick, effortless coffee.
But if you enjoy learning a skill, tinkering, dialling-in, and chasing that café-quality espresso at home, a manual machine offers the greatest potential and the biggest upgrade path over time. These machines are for people who appreciate the craft as much as the cup, and who don’t mind getting their hands a little messy along the way.
One thing that surprises many people: with manual machines, the grinder matters just as much as the machine, often even more. A great espresso machine can’t fix an inconsistent grind, so if you want balance, repeatability, and real flavour clarity, the grinder is non-negotiable. See the grinder suggestions to help you get the most out of your chosen espresso machine.
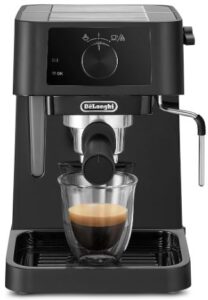
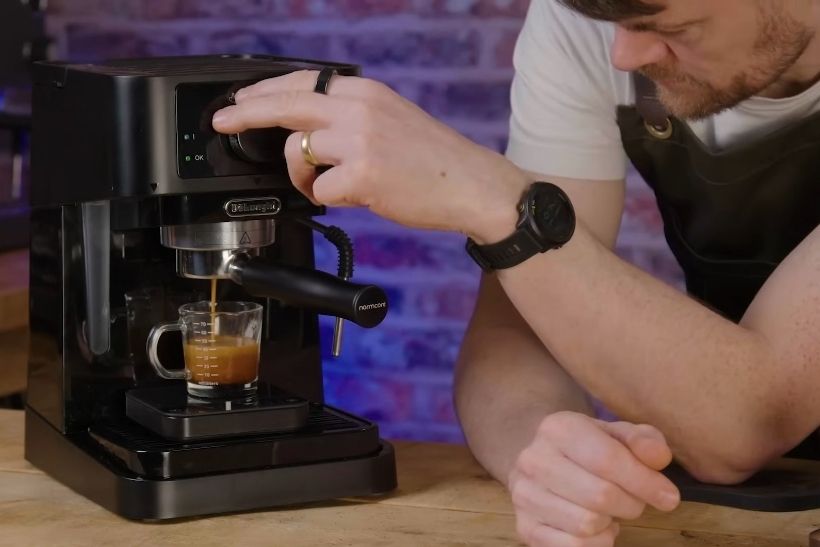
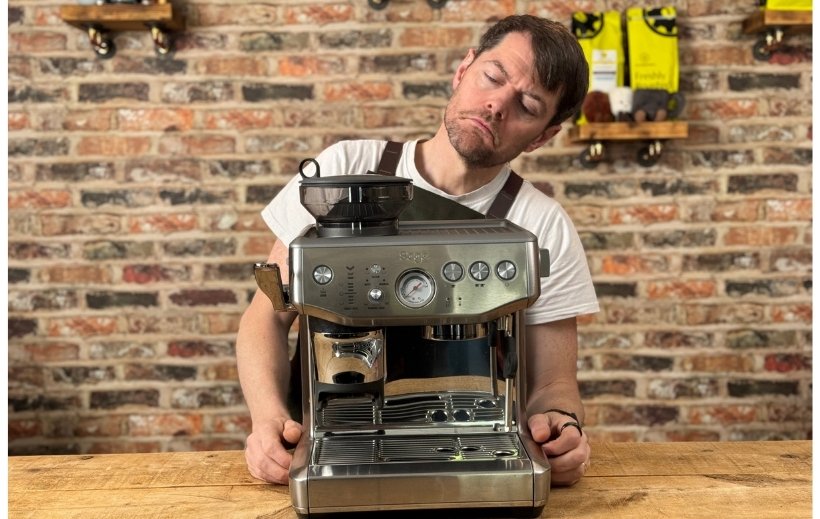
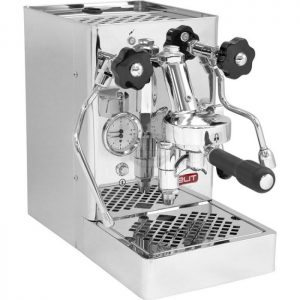
The Stilosa EC-230 is De’Longhi’s “secret handshake” to the budget home-barista crowd. A genuinely interesting little machine at around the £100 mark that’s actually set up for real espresso, not just pretend crema and supermarket pods.
Why it wins: Because it’s one of the very few machines under £200 that’s genuinely home-barista ready straight out of the box.
Features
Approx. price: usually around £80–£100
Boiler: ~150 ml stainless steel boiler (not a thermoblock)
Portafilter: 51 mm, with 1-cup & 2-cup standard (non-pressurised) baskets
Steam wand: “Pro” steam wand with a single-hole tip
Water tank: 1 L
Dimensions (W × D × H): 21 × 26.5 × 30.5 cm
Cup clearance: ~8 cm with drip tray in place, ~10 cm with tray removed
Pump: 15-bar vibration pump
Interface: Simple selector dial for espresso/steam/hot water
Body: Compact, lightweight plastic housing
My Observations
The Stilosa EC-230 is the “geeky sibling” in the Stilosa family. On paper, it looks like just another cheap De’Longhi, but the key is what’s hiding in the details: standard baskets and a proper steam wand. That combination is incredibly rare at this price point and immediately makes it more interesting for anyone wanting to dip their toes into real espresso rather than just “coffee-flavoured hot milk”.
It’s a small, light, mostly plastic machine, so don’t expect the heft or steel chassis feel of something like a Gaggia Classic. But it doesn’t look offensive on the counter, and it’ll tuck into smaller kitchens very easily. The dial-based interface is straightforward and feels a bit Duo-Temp-ish – twist to brew, twist to steam, job done.
In use, it behaves more like a “proper” espresso machine than most of the cheap stuff. The little boiler means you get a constant pump sound rather than the knocking, pulsing racket many thermoblock machines make. With fresh beans and a half-decent grinder, you can actually learn to dial in and pull recognisably good espresso, not just brown liquid under pressure.
The steam wand is another big plus. It’s not some chunky panarello that just aerates everything into bubbly bath foam; it’s a basic but genuine wand that lets you learn to texture milk for flat whites and cappuccinos. You’ll still need to practice, and you’re not getting Silvia-level steam power here, but for this price, it’s surprisingly capable.
It’s not magic, of course. The limitations are exactly what you’d expect from a sub-£200 machine: basic temperature control, no 9-bar OPV, small boiler, and relatively lightweight build. But as a cheap way into the home-barista rabbit hole, it’s far better thought-out than most of the competition. Go to the pairing grinder section →
What I Like
Standard (non-pressurised) baskets included at this price
Proper “pro” steam wand that lets you learn real milk texturing
Actual boiler rather than a pulsing thermoblock
Very compact and kitchen-friendly
Genuinely home-barista focused out of the box
Incredible value as a starter machine for fresh beans and a real grinder
What I Like Less
Mostly plastic build – doesn’t feel as “serious” as more expensive machines
51 mm portafilter size = fewer options for accessories vs 58 mm
No 9-bar or adjustable OPV, so you’re working around higher pump pressure
Single boiler: can’t brew and steam at the same time, and there’s a bit of faff switching modes
Needs a decent grinder and good beans to shine – not a miracle worker with supermarket pre-ground
Final Verdict, And Who is the De’Longhi Stilosa EC-230 For?
The De’Longhi Stilosa EC-230 is ideal for anyone on a tight budget who wants a proper entry into home-barista espresso rather than just a cheap “espresso-style” gadget. If you’re happy to buy fresh beans, invest in a capable grinder, and spend a bit of time learning about dosing, grind size, and milk steaming, this is a brilliant little starting point for under £200.
If you just want something simple to use with pre-ground coffee and as little faff as possible, one of the other Stilosa models (with pressurised baskets) or a bean-to-cup machine will probably suit you better. But if you’re curious about the hobby and want the lowest-cost way of doing things “properly”, the EC-230 is very hard to beat. Read My De'Longhi Stilosa EC-230 full review →
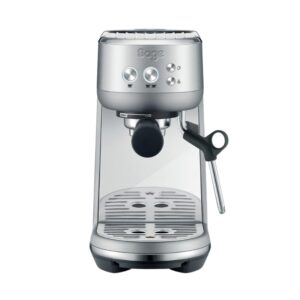
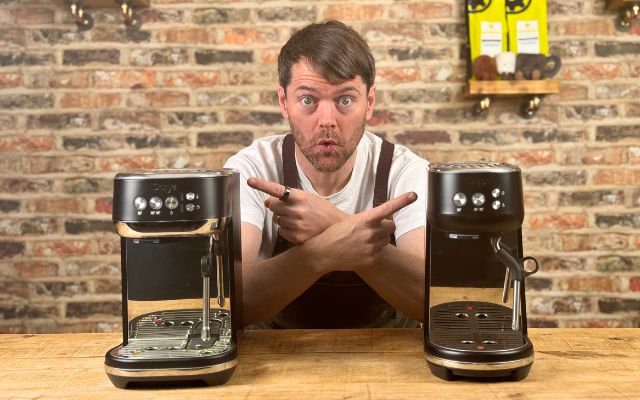
The Sage Bambino is one of the best “next-step” machines for anyone getting serious about home espresso without wanting a massive box taking over the kitchen. It’s compact, heats up in seconds, and, most importantly, it nails the fundamentals: proper PID temperature control, true 9-bar brewing, and pre-infusion. In short, this is a small machine that behaves like a grown-up one.
Why it wins: It offers proper espresso performance, a fast workflow, and a small footprint without the extra cost of auto-frothing or added complexity.
Features
ThermoJet system ready to brew in 3 seconds
PID temperature control (fixed 93°C)
Low-pressure pre-infusion
9-bar OPV (not the marketing 15-bar nonsense)
54 mm portafilter with pressurised and standard baskets included
Manual steam wand (single-hole tip)
Dedicated hot water button (great for Americanos)
Compact footprint: approx. 16cm wide
1.5L removable water tank
Vibration pump ~50–55 dB noise level
My Observations
The Bambino is one of those machines that doesn’t look like much at first glance, but once you use it, it becomes clear why it has a cult following. The 3-second heat-up isn’t just marketing fluff; it means you can switch the machine on and pull a shot faster than you can decide which mug to use.
Espresso quality between the Bambino and Bambino Plus is identical, same temperature, same OPV, same pre-infusion. So flavour comes down to beans, grinder, and time spent learning to dial in. With standard baskets and fresh beans, you can get honestly impressive results.
Steaming is manual-only and takes a little longer than the Bambino Plus, but it’s perfectly capable of creating proper microfoam once you get the hang of it. If you’re someone who wants to learn the barista side of things, that’s actually a plus (no pun intended).
Workflow-wise, it’s fast, faff-free, and ideal if you mainly drink Americanos, long blacks, or straight espresso. That hot water button makes life easier than you'd expect. Go to the pairing grinder section →
Stock 54mm portafilter isn’t great (upgrades exist)
Single-hole steam tip = slower steaming
Small drip tray (normal for the size, but still small)
Fixed temperature: not ideal for light roasts
Final Verdict, And Who Is The Sage Bambino For?
The Bambino is for people who want proper espresso at home, quickly, in a small space, without paying for automation they don’t need. If you mainly make black coffee, long blacks, or the occasional milk drink (and you don’t mind steaming manually), the Bambino is the smarter buy. It’s simple, fast, reliable, and punches way above its price bracket, especially when discounted. Read My Sage Bambino Vs. Bambino Plus full review →
The Bambino Plus takes everything great about the Bambino and adds convenience, mainly in the steaming department. If you make lots of flat whites, lattes, or cappuccinos and you want fast, consistent milk texture with less effort, this is where the Plus earns its name.
Why it wins: Because it’s one of the easiest ways to make proper espresso + café-style milk drinks at home without needing to learn milk technique straight away.
Features
Everything the Bambino has, plus:
Auto milk steaming with three temperature + three texture settings
Faster steaming (four-hole steam tip) ~12 seconds quicker than Bambino
3-way solenoid valve (drier pucks, no “portafilter sneeze”)
Larger 1.9L water tank
Slightly wider footprint (19.5cm)
My Observations
If the Bambino is the minimalist, the Bambino Plus is the one that asks, “Coffee? Milk? Foam? No problem; give me a minute.”
The auto-steam function is genuinely useful, not a gimmick, and it's surprisingly consistent. Whether you like cappuccino foam or a silky flat white texture, it gets you there with a minimal learning curve. Manual steaming is still available, and it’s faster than the Bambino thanks to the four-hole tip.
The three-way solenoid valve is a nice touch, preventing soggy pucks and angry spurts of espresso when you remove the portafilter too soon. The flip side → that solenoid dumps water into the drip tray, and with this machine’s tiny tray, you’ll be emptying it constantly.
Otherwise, performance is identical to the Bambino, same espresso quality, same flavour potential, same workflow speed. Go to the pairing grinder section →
What I Like
Fantastic auto-steam, great for beginners or busy mornings
Faster steaming for milk-drink lovers
Drier pucks thanks to the solenoid valve
A slightly larger tank means fewer refills
What I Like Less
No dedicated hot water button (more button pressing faff)
Small drip tray fills constantly
More moving parts = more that could go wrong after warranty
Price jump is only worthwhile if you steam milk regularly
Final Verdict, And Who Is The Sage Bambino Plus For?
The Bambino Plus is ideal for anyone who mostly drinks milk-based espresso drinks and wants a fast, repeatable workflow. If you’re making cappuccinos and flat whites every day, the Plus pays for itself simply in convenience and steaming performance. If you mainly drink espresso or Americanos or you enjoy steaming milk manually, the standard Bambino is a better value. Read My Sage Bambino Vs. Bambino Plus full review →
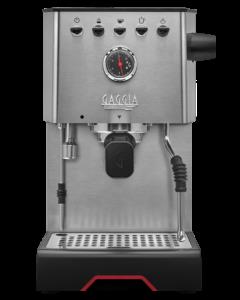
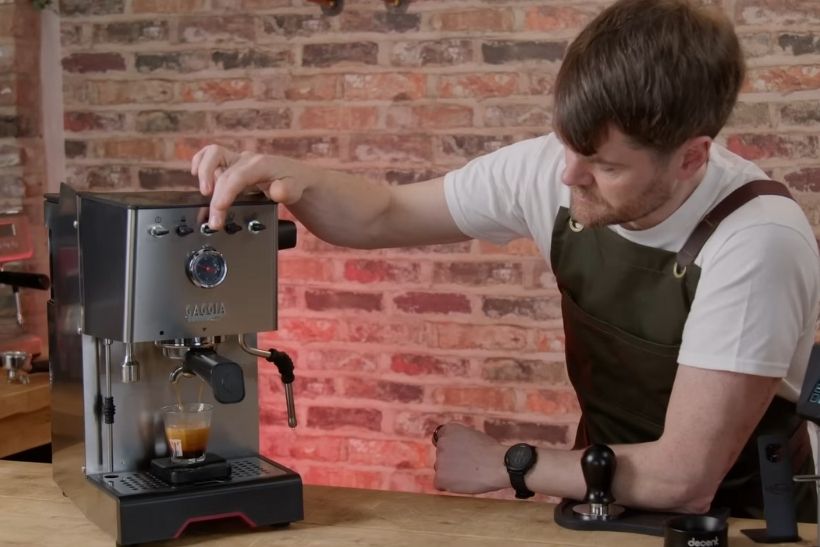
If you've been around home espresso for more than five minutes, you’ve probably already bumped into the Gaggia Classic, usually spoken about in the same way people talk about classic cars, vinyl records, and The Sopranos. It’s one of the most iconic entry-level machines for proper home-barista espresso, and the latest Classic Pro E24 version continues that legacy with a few bumps along the way (yes, Boilergate, I’m looking at you).
Why it wins: Because for under £500, nothing else offers this level of build quality, espresso potential, and modding capability.
Features
Boiler type: ~110ml single boiler (Aluminium on older versions, Brass on E24)
Group head: Solid brass (E24, chromed brass on older versions)
Steam Wand: Professional wand (2-hole tip)
3-way solenoid valve
Standard 58mm portafilter (now solid stainless steel)
OPV pressure management (adjustable via mod, not factory-adjustable in most regions)
Comes with both pressurised and non-pressurised baskets
Made in Italy
Compatible with a wide range of aftermarket mods (PID, OPV spring, dimmer, etc.)
My Observations
The Classic Evo Pro still feels like a machine built by people who genuinely care about espresso: mainly stainless steel, solid, purposeful, no-nonsense. It’s not flashy or touchscreen-based, and it doesn’t try to be. It’s the “learn it and it will reward you” type of machine.
Out of the box, it’s capable of very respectable espresso, especially if you’re using freshly roasted beans and a half-decent grinder. But the real magic of the Classic is that it grows with you. The workflow is completely traditional: grind, tamp, lock in, pull the shot, steam your milk. There are no shortcuts and no training wheels here, which is precisely why so many people swear by it.
Steaming is surprisingly good for a single boiler in this price range. You do have to wait between brewing and steaming, but that’s normal for single-boiler machines. The newer brass boiler (E24) does offer a little more steam power and slightly more stability, but even the earlier aluminium-boiler versions punch above their weight.
It’s also one of the most moddable espresso machines ever made, and I know that sounds odd to people who just want a coffee machine and not a DIY project. But for a lot of home baristas, that’s part of the fun. With a PID, OPV spring, and maybe a dimmer mod, the Classic suddenly competes with machines costing two or three times as much. Go to the pairing grinder section →
What I Like
Built like a proper machine, not a toy
Fully serviceable with widely available spare parts
Capable of excellent espresso with the right grinder
Standard 58mm group, huge choice of baskets and accessories
Great upgrade path (PID, OPV spring, etc.)
Holds its value incredibly well second-hand
What I Like Less
Out-of-the-box temperature stability isn’t amazing (surfing needed unless modded)
Not the most user-friendly machine for absolute beginners
No PID or adjustable OPV as standard
Steam and brew switches between modes (single boiler life)
Final Verdict, And Who is the Gaggia Classic Evo Pro For?
The Gaggia Classic Evo Pro is for people who want to learn espresso, not just drink it. If you enjoy tinkering, adjusting, improving, and developing skills, this machine will be incredibly rewarding and could easily last for decades with proper care. It’s a brilliant starting point for anyone who wants a real espresso workflow at home and doesn't mind a bit of practice (and possibly modding) to unlock its full potential.
If, however, you just want convenience or you want your machine to do most of the thinking for you, then there's a good chance you'd be happier with something like the Sage Bambino Plus or one of the “in-between” machines later in this guide.
That being said, for under £500, if you want a proper espresso machine you can grow with, the Gaggia Classic Evo Pro remains one of the safest and most iconic choices around. Read My Gaggia Classic Evo Pro full review →
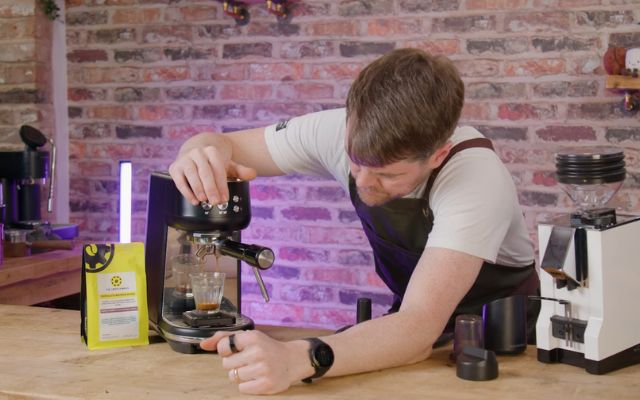
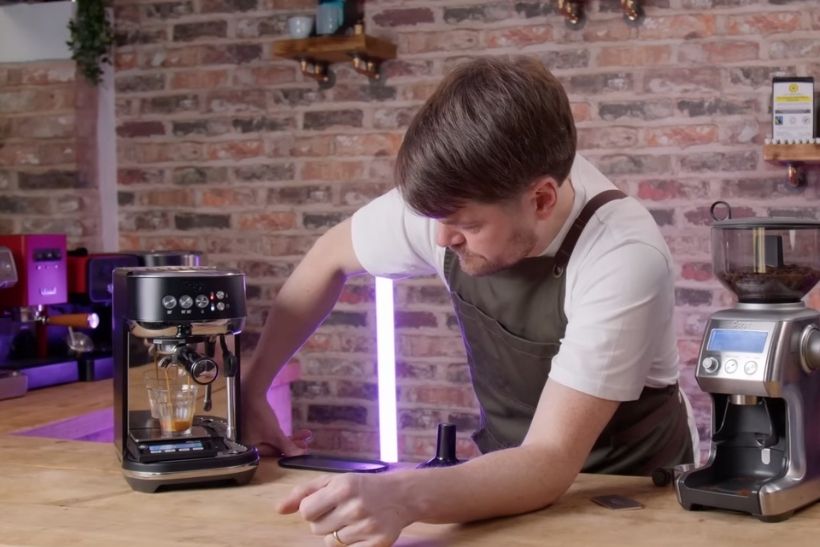
There’s no neat “under £1,000” category, so this is the first proper jump up, and the Sage Dual Boiler is where things get serious. It’s basically a café machine that’s been shrunk, tidied up, and taught some very good manners for home use. Dual boilers, ridiculous temperature stability, loads of control over pre-infusion and brew temp… this is the point where you stop “dabbling” in home espresso and fully embrace the hobby.
Why it wins: It delivers near–commercial temperature stability and control, dual-boiler convenience, and home-friendly usability at a price where most competitors are still arguing over heat exchangers.
Features
Dual boiler setup:
450 ml PID-controlled brew boiler
950 ml PID-controlled steam boiler
Integrated heat exchanger feeding the brew boiler for extra thermal stability
PID-controlled heated group head with temp sensors in both boiler and group
Adjustable brew temperature (approx. 86–96°C) via the LCD
Adjustable pre-infusion time (0–90 seconds) and power (pump percentage)
Programmable shot buttons (timed or volumetric) + manual shot button
Built-in shot timer & pressure gauge
Powerful pro steam wand on a ball joint with steam lever (not a twisty knob)
Dedicated hot water spout (needle-valve type)
Auto-on timer + 15-minute energy-saving auto-off
2.5 L water tank (front fill flap or removable from rear)
Large drip tray with “Empty Me” indicator
Internal cable tidy and front wheel for easy sliding out
Fairly compact for a dual boiler: ~37 cm tall, wide, and deep
My Observations
The Dual Boiler is one of those machines that, on paper, sounds a bit “too good for the money”, and then you actually use it and realise that, no, it really is that good.
From a workflow point of view, it’s very “Sage”: friendly LCD, sensible buttons, thoughtful little touches like the cable tidy, wheel, top-fill tank flap, big drip tray, and “Empty Me” indicator. You can tell someone actually used this in a standard kitchen rather than just designing it on a whiteboard.
What makes it special, though, is the engineering under the skin. You’re not just getting two boilers; you’re getting dual boilers, a heat exchanger feeding the brew boiler, and a heated group with dual PID feedback. In real-world terms, that means you set a brew temp, say 93°C for your usual blend or 95–96°C for a lighter roast, and the machine quietly gets on with actually delivering that temperature at the puck, shot after shot.
The control over pre-infusion is another big win. Being able to tweak both time and pump power, and even hold pre-infusion manually via the button, lets you move beyond the standard “25–30 seconds from first drip” playbook. Finer grinds, longer low-pressure ramps, “Slayer-ish” style shots. It’s all there if you want to nerd out later.
Steam is strong, dry, and always ready, as you’d expect from a proper steam boiler. The lever control feels great in daily use and makes steaming milk for multiple drinks a breeze compared with single-boiler machines or small thermoblocks.
It isn’t perfect in the sense of “never needs looking after”. Nothing at this level is. You still need to respect limescale, keep filters fresh, and accept a bit of servicing down the line. And the EU-mandated 15-minute auto-off can be mildly rage-inducing until you train yourself to use the auto-on timer. But in terms of daily experience in front of the machine, it’s very, very hard to fault. Go to the pairing grinder section →
What I Like
Incredible temperature stability for the money
Fully adjustable brew temp with clear LCD control
Very flexible pre-infusion (time and power), huge scope for experimenting
True dual boiler: simultaneous shot pulling and steaming
Proper, powerful steam wand on a ball joint
Thoughtful “little things”: wheel, cable tidy, top fill, big tray, “Empty Me” flag
User-friendly enough for beginners, but deep enough for serious tinkering
Compact for a dual boiler, easier to live with than many E61 prosumer boxes
What I Like Less
15-minute auto-off can be annoying if you’re disorganised
Needs sensible water management, scale can cause expensive problems if ignored
Plastic group collar insert is a known wear part (cheap, but labour-intensive to replace)
The stock portafilter is fine, but many will want to upgrade
Not cheap, and you still need a genuinely good grinder to do it justice
Final Verdict, And Who is the Sage Dual Boiler For?
The Sage Dual Boiler is for anyone who is all-in on home espresso, whether you’re just starting or you’ve already done your time on single boilers and entry-level kit. If you want café-level performance, dual-boiler convenience, serious control over temperature and pre-infusion, and you don’t fancy a huge, shiny E61 box dominating the kitchen, this is an outstanding choice.
It’s not for someone who just wants to press a button and be done; if that’s you, you’re better off with bean-to-cup or a Sage Oracle. But if you’re willing to learn the craft, and you’re prepared to pair it with a proper grinder and good beans, the Dual Boiler is one of the most compelling machines on the market at this price. Read My Sage Dual Boiler full review →
If the Sage Dual Boiler is the obvious hero in this price bracket, the Lelit Elizabeth is the quietly brilliant alternative: classic Italian boxy stainless look, compact depth, dual boiler, loads of control, and one of the nicest hot-water setups you’ll find on a home machine.
Why is it on the list?
Because it’s ridiculously capable for the money, with:
True dual boilers
Adjustable PID on both boilers
Two advanced pre-infusion modes (including steam-powered low-pressure pre-infusion)
Great steam, great hot water, excellent temperature stability
…and it manages all of that while looking and feeling like a proper Italian prosumer machine, without the usual prosumer price.
At a glance
Price: £1,199.95 (often ~£1,080 with 10% off or a good deal)
Boilers:
300 ml brass brew boiler
600 ml stainless steel steam / hot water boiler
Group & portafilter: 58 mm chrome-plated brass integrated group, 58 mm PF (standard commercial size)
Temperature control:
PID on both boilers
Brew: 80–110 °C in 1 °C steps
Steam: 115–145 °C in 1 °C steps
Pre-infusion:
Bloom (pump on, pause, then full extraction)
Steam-powered low-pressure (1.2–2.6 bar from steam boiler)
Both fully programmable for pump-run time & total pre-infusion time, independently per shot button
Interface: Lelit Control Centre (LCC) OLED – sets temps, pre-infusion & shot programming
Hot water:
Proper tap, smooth, non-spitty flow
Mixes from both boilers when the steam boiler is on
Still dispenses from the brew boiler only with the steam boiler off
~200 ml in ~20 seconds
Steam:
No-burn wand on a ball joint
2-hole tip, powerful but manageable
170 ml to 60 °C in the mid-20-second range at higher steam temps
Heat-up:
“Ready” in ~8 minutes
Best stability after ~20 minutes
Noise: ~45–50 dB – one of the quieter vibration-pump machines
Tank: 2.5 L rear-access reservoir (steam boiler can be toggled off to save energy)
Size: ~32 cm wide × 27–28 cm deep × 38 cm tall (quite shallow front-to-back)
My observations
The Elizabeth is very much a “sleeper” machine: it doesn’t shout about itself as loudly as some rivals, but it gives you serious control over espresso that you usually have to pay more for.
The pre-infusion system is the star: you can choose between classic bloom pre-infusion or a clever steam-powered low-pressure pre-infusion that uses steam boiler pressure to gently soak the puck. Both modes are fully adjustable, and each of the two shot buttons can have its own profile, so you effectively get two saved “recipes” per coffee.
Temperature-wise, it’s properly grown-up: independent PID control for both boilers, fine adjustments, and an integrated 58 mm brass group that warms up faster than a big E61 while still offering really solid stability once heat-soaked.
The hot water function is weirdly impressive. The tap is proper café-style, the flow is smooth, it’s quick, and you can effectively choose cooler water for ready-to-drink Americanos (steam boiler off) or hotter water for tea (steam boiler on). If you make a lot of Americanos or drink tea, this is a genuine quality-of-life feature.
Steam is strong, dry, and controllable; the 2-hole tip and ball-joint wand make proper microfoam very achievable. It’s powerful enough to be fast, but not so wild that it’s intimidating.
Overall, it feels like a compact Italian dual-boiler workhorse that’s been given modern brains via the LCC. Go to the pairing grinder section →
What I Like
Huge control for the price – PID on both boilers + two programmable pre-infusion modes
Excellent hot water – fast, smooth, adjustable in practice via steam-boiler on/off
Quiet for a vib-pump machine – similar to the Mara X
Classic prosumer look – stainless body, metal drip tray, 58 mm group
The steam boiler can be turned off – handy if you’re only pulling shots or saving energy
Doesn’t need HX-style cooling flushes – once warmed up, it’s stable and ready
What I Like Less
The steam knob feels a bit cheap compared with the rest of the machine (easily fixed with an aftermarket wooden knob if it bothers you)
Rear-access water tank with no handle – slightly less convenient to remove
Manual & UI are a bit vague on some of the more advanced pre-infusion settings
No built-in auto-on timer (though you can fake it with a smart plug)
Sage Dual Boiler vs Lelit Elizabeth: Which one should you pick?
Choose the Lelit Elizabeth if:
You love the classic Italian stainless-steel box look and 58 mm “standard everything” ecosystem
You’re big on Americanos / Long Blacks and tea, and want excellent hot water performance
You’re into light and medium roasts and like the idea of bloom-style pre-infusion with lots of control
You want the option to turn off the steam boiler when not needed
Choose the Sage Dual Boiler if:
Counter depth/height is tight, and you like the front fill flap + wheels for easy moving
You want faster “full stability” in the morning and auto-on scheduling
You’re interested in pump-controlled pre-infusion and possibly modding for manual flow control later
You prefer Sage’s very user-friendly LCD and steam lever style workflow
Both can produce outstanding espresso and milk drinks. The Elizabeth is the more “traditional Italian dual boiler with clever pre-infusion and hot water”; the Sage Dual Boiler is the “ultra-engineered, feature-rich, very user-friendly all-rounder.” Read My Lelit Elyzabeth full review →
The Lelit Bianca V3 is one of those machines that makes home baristas start quietly working out how many months of takeaway coffee they can “offset” the price with. It’s a serious bit of kit: dual boiler, rotary pump, E61 style group, and proper flow control, the kind of feature set you usually see on machines two, three, even six times the price. Price: ~£2,199.95 RRP (often around £1,979.95 with my exclusive 10% discount code)
Why it wins: Because it gives you GS3 / Slayer / Rocket R Nine One levels of control and cup potential at roughly a third of the price, without feeling like a compromise machine. If you want a true “end-game (for now)” manual espresso machine you can grow into for years, Bianca is an absolute weapon.
Pump: Quiet rotary pump (can be plumbed in or run from tank)
Group: E61-style group with manual flow-control paddle
Water tank: 2.5 L, on a movable “backpack” that can sit behind the machine or on either side
Temperature control: PID-controlled, brew temp adjustable in 1 °C steps (or 1 °F steps)
Flow / pre-infusion:
Manual flow control via paddle
Programmable pre-infusion, bloom (shot pause), and low-flow phases via LCC
Brew temperature offset feature (sets how the boiler behaves during the shot)
Steam wand: Pro steam wand with strong, dry steam – ideal for latte-art milk
Gauges & UI: Dual manometer (steam & brew) + separate brew pressure gauge, shot timer, Lelit Control Centre (LCC)
Plumbing: Tank or direct plumb-in option
Standby & auto-off: Energy-saving standby mode, with optional auto-off
Dimensions (W × H × D): ~29 × 39 × 48.5 cm (without tank sticking out the back)
My Observations
Bianca is very much in “proper prosumer machine” territory, but it doesn’t take itself too seriously. On the surface, it’s a classic shiny Italian box with an E61 group and levers and gauges, the kind of thing that looks just as happy in a coffee bar as in a kitchen. Look closer, and you realise Lelit has quietly built one of the most capable home machines on the market.
The rotary pump is the first giveaway that this isn’t your average dual boiler. When you pull a shot, the sound of the espresso hitting the cup is usually louder than the pump. No more cups trying to walk off your scales thanks to vibration. Add dual boilers and an E61 group, and you’ve already ticked most of the “serious machine” boxes.
Where Bianca really steps away from the pack is flow control and programmability. You can keep it simple: lever up, paddle fully open, quick pre-infusion, a standard 25–30-second shot, and it behaves like a refined, classic dual boiler. But as soon as you start nudging the paddle and using the LCC, it turns into a completely different beast.
You can do soft, low-pressure pre-infusion, long blooms, gentle low-flow starts for light roasts, tapered finishes, and all sorts of “Slayer-esque” shots that coax sweetness and complexity out of coffees that would just taste sour or flat on more basic machines. It’s the kind of extra control that only makes sense once you’ve used it, and then it’s very hard to go back.
Day to day, it’s more user-friendly than the intimidating look suggests. Heat-up time is classic E61: the boilers hit temp fairly quickly, but the group needs a good 25 minutes to really settle. Most owners just plug it into a smart plug and treat it like a very fancy kettle that turns on by itself before they wake up. Standby mode is clever too; it drops boiler temps, so reheating is faster than from stone cold.
Steam is strong without being ridiculous, so learning latte-art milk is more about your technique than wrestling with insane power. Because it’s a dual-boiler, you can actually steam and brew at the same time without the machine breaking a sweat.
The only thing that really holds Bianca back from perfection is software, not hardware. There’s a lot of programmability, but no way to store multiple named profiles and flick between them at the touch of a button. You can program behaviour, you just can’t save “Kev’s Light Roast Profile”, “Chocolatey Flat White Profile”, and so on. Given what the machine is capable of, that feels like the one obvious missing piece. Go to the pairing grinder section →
What I Like
True high-end spec: dual boilers, rotary pump, E61 style group, flow control – all in one package
Massive control over the shot: manual paddle + programmable pre-infusion, bloom, and low-flow phases
Fantastic with a wide range of beans, from chocolatey blends to stubborn light roasts
Very quiet in use thanks to the rotary pump – no more vibrating cups
Strong, dry steam that’s ideal for proper latte-art milk
Classic Italian looks with a premium feel and flexible water tank placement
A machine you can start simple with and grow into for years as your home-barista skills develop
What I Like Less
No stored shot profiles – you can program behaviour, but you can’t save and quickly switch between multiple profiles
E61-style group means longer warm-up times (you’ll want a smart plug or some patience)
The temperature offset feature can be misunderstood – it’s helpful, but it’s not a “live temperature profiling” magic wandPrice + grinder reality: at this level, you really need a serious grinder too, which pushes the total investment up
Final Verdict, And Who is the Lelit Bianca V3 For?
The Lelit Bianca V3 is for anyone who wants a genuinely high-end, manual espresso machine and is either already deep into the home-barista hobby or very happy to fall into it.
If you like the idea of:
Controlling how the water hits the puck, not just how long the shot runs
Getting the best out of anything, from dark chocolatey blends to light, fruity single origins
Having a machine that can go toe-to-toe with GS3 / Slayer / R Nine One style setups in terms of what you can do with a shot – without their price tags
…then Bianca makes a very strong case for being your “buy once, cry once” machine.
If, on the other hand, you just want something quick and easy for a couple of flat whites before work, don’t fancy leaving a machine warming up, and the idea of flow control makes your eyes glaze over, you’ll probably be happier (and wealthier) with something like a Sage Dual Boiler or Lelit Elizabeth.
But if you’re ready to treat espresso as a proper hobby and you want a machine that won’t limit you for a very long time, Bianca V3 is precisely what this “Best High-End Manual Espresso Machine” slot is made for. Read My Lelit Bianca V3 full review →
If the Bianca is the elegant Italian supermodel, the Gaggia Classic GT is her industrial, slightly chiselled cousin who turns up in steel toe-caps and just gets stuff done. It’s Gaggia’s first dual-boiler home machine, but it’s not “just a Classic with an extra boiler bolted on”. It’s a proper prosumer dual boiler with its own personality and some very clever tricks. Price:£1,699 RRP, often around £1,439.10 with exclusive discount code.
Why it is the runner-up: Because it’s a seriously capable dual boiler with unusually smart features, low-flow pre-infusion with bloom, hot-water mode for Americano fans, externally adjustable OPV, quick heat-up, all wrapped in a tank-like, industrial body. It’s a brilliant option if you love the idea of a high-end manual machine but don’t quite want to stretch to Bianca's money.
Features
Approx. price: £1,699 RRP (often ~£1,439.10 with discount)
Boilers:
120 ml brass brew boiler, PID-controlled
0.9 L stainless steel steam / hot water boiler, insulated & PID-controlled
Pre-infusion: Low-flow pre-infusion with bloom step
3 presets: Light / Medium / Dark roast
Plus, fully manual pre-infusion
OPV:Externally adjustable – drop basket pressure to 9 bar (or lower) in seconds
Interface: TFT display on top + “toggle-style” switches on the front
Shot control: Manual & volumetric shots with built-in shot timer
Hot water: Fast, commercial-style hot water tap + hot-water mode on the service boiler
Steam wand: Chunky wand on a ball joint, single-hole tip
Group & portafilter: 58 mm brass group, 58 mm portafilter (Classic-compatible fitting)
Water tank: 2 L, rear-accessed, with low-water notification
Energy & scheduling: Eco mode, adjustable standby time, auto-on scheduling
Dimensions (W × D × H): 26.5 × 41 × 42.2 cm
My Observations
The Classic GT is very much its own thing. Yes, it says “Classic” on the front, and yes, it shares the same style of small brass brew boiler as the modern Gaggia Classic, but in terms of ambition and capability, this is a proper premium dual boiler, not a Classic with ideas above its station.
The look is pure industrial Italian: sharp edges, chunky steel, and a stance that will divide opinion. Some people will call it “fugly”; others, “handsome”. Either way, it looks like a serious machine, and in the flesh, it feels extremely solid.
What really makes it interesting is the feature set:
The low-flow pre-infusion + bloom is genuinely helpful, especially when you’re swapping between light, medium, and dark roasts. You can use the presets or go fully manual and play with longer soft pre-infusion and bloom.
The hot-water mode is brilliant if you drink a lot of Americanos or Long Blacks. Instead of scalding water off the steam boiler, you can run it at a lower temp for instant “drinking temperature” hot water, then bump it back up to steam when needed.
The externally adjustable OPV is one of those “why doesn’t every machine have this?” features. Being able to tweak brew pressure without taking the thing apart is a big win for home baristas.
Heat-up is quick for a dual boiler (about 4 minutes to brew-ready, ~7 minutes for steam), steam power is properly punchy, and workflow with the front “toggles” is very intuitive once you get used to them, even if they’re technically button-shaped switches rather than real toggles.
It’s not perfect, of course. The top-mounted screen is a bit awkward if your machine lives on a high worktop or you’re not the tallest. The rear water tank is also a faff if the machine is wedged under wall units; you’ll either want easy access to the back or a front-fill hack. But there are no real deal-breakers here, just practical quirks. Go to the pairing grinder section →
What I Like
Proper dual boiler with dual PID at this price from a big, known brand.
Low-flow pre-infusion with bloom step and roast-based presets, plus manual control.
Hot water mode on the service boiler – great for Americano/Long Black drinkers.
Externally adjustable OPV – 9 bar in seconds, no tools, no disassembly.
Fast heat-up for a dual boiler and strong steam performance.
Solid, industrial build that feels like it’ll outlive your kitchen.
What I Like Less
Rear-access water tank on a tall, heavy machine = awkward if it lives under cupboards.
Low-water warning appears after you’ve run out – not the most proactive alert system.
The top-mounted TFT screen can be hard to see on higher surfaces or for shorter people.
“Toggle switches” are really just shaped buttons – purely aesthetic, not true mechanical toggles.
Single-hole steam tip only – some users would expect a multi-hole tip at this price.
Final Verdict, And Who is the Gaggia Classic GT For?
The Gaggia Classic GT is ideal if you:
Love industrial, “proper machine” aesthetics
Drink a lot of Americanos / Long Blacks and really value that hot-water mode
Like the idea of low-flow pre-infusion + bloom without going full-on flow-profiling paddle machine
If you’re more into classic E61 looks, rotary pumps, and manual paddles, the Lelit Bianca is still the “best high-end” pick. But if you want something a bit more compact, more industrial, a bit different, and you make as many black coffees as milk drinks, the Gaggia Classic GT is a very worthy runner-up in the high-end manual category. Read My Gaggia Classic GT Dual Boiler full review →
Dual boiler:
– 800 ml stainless steel brew boiler
– 1.5 L stainless steel steam boiler
Dual boiler:
– 120 ml lead-free brass brew boiler (PID)
– 0.9 L stainless steel steam/hot water boiler (PID, insulated)
Pump Type
Quiet rotary pump (can be plumbed in)
Vibration pump (quiet, prosumer-level)
Group & Portafilter
E61-style group
58 mm chrome-plated brass portafilter
58 mm brass group
58 mm stainless steel portafilter (Classic-compatible fitting)
Pressure / Flow Control
Manual flow/pressure control via brew paddle
Programmed low-flow phases via LCC (start/end of shot)
Externally adjustable OPV (easily set 9 bar or lower)
Fixed pump, but low-flow pre-infusion + bloom control
Pre-Infusion
– Manual pre-infusion via paddle
– Programmable pre-infusion, bloom, and low-flow phases via LCC
Low-flow pre-infusion with bloom:
– 3 presets: Light / Medium / Dark roast
– Fully manual pre-infusion also available
Temperature Control
Dual PID (brew & steam)
Brew temp adjustable 80–115 °C
Temp offset feature (boiler on/off behaviour during shot)
Dual PID (brew & steam)
Brew temp quickly adjusted via +/– near display
Steam temp adjustable (120–135 °C, 5 °C steps)
Steam Performance
Powerful, dry steam from 1.5 L boiler
~27–28 seconds for ~170 ml milk to 60 °C (Kev’s test)
Strong steam, very capable at max steam temp
~20 seconds for ~170 ml milk to 60 °C at 135 °C setting
Hot Water
Dedicated hot water spout from the steam boiler
Classic dual-boiler behaviour, great for Americanos
Commercial-style hot water tap
**Hot Water Mode** on steam boiler for Americano-friendly temps
Very fast hot water delivery
Water Tank
2.5 L tank
Can be mounted at the back or on either side of the machine
2 L rear-access tank
Low-water warning (appears once you’re basically empty)
Dimensions (W × D × H)
29 × 48.5 × 39 cm
26.5 × 41 × 42.2 cm
Warm-Up Behaviour
~25 minutes to fully heat E61 group for max stability
Standby mode lowers boiler temps for quicker re-heat (~10 minutes)
~4 minutes to brew-ready, ~7 minutes to steam-ready (220 V)
First shot right at “ready” benefits from a quick cooling flush
Plumb-In Option
Yes – rotary pump, can be tanked or plumbed in
No – tank only
User Interface
Lelit Control Centre (LCC) with
– Shot timer
– Pre-infusion, low-flow, temp offset, etc.
TFT screen on top + “toggle” switches
– Auto-on schedules, eco mode, standby
– Pre-infusion presets & manual control
– Quick temp adjustments from the top panel
Best Suited To
Home baristas wanting **maximum control & profiling**
Light–dark roast flexibility
Plumb-in option & rotary pump quietness
“End-game (for now)” machine with manual paddle
Users who love **industrial looks** and strong workflow features
Americano / Long Black drinkers (hot-water mode)
People wanting quick dual-boiler heat-up & adjustable OPV
Those who like structured but simpler pre-infusion vs full paddle profiling
Main Drawbacks
E61 warm-up time
No stored shot profiles / presets
Temp offset can be misunderstood as “live temp profiling”
The rear tank + height makes under-cupboard use awkward
Top-mounted screen not ideal for higher worktops / shorter users
Pre-infusion presets not user-editable
No plumb-in option
Many people approach the grinder as an afterthought, and I get it; I did exactly the same when I bought my first espresso machine. Espresso machines are way more exciting than boring grinders.
Here's the thing, though: The grinder is more responsible for coffee quality than the espresso machine.
If you're mainly focused on espresso quality, you'd be well-advised to spend just as much, if not even more, on your grinder!
These pairing suggestions, therefore, are the same regardless of the espresso machine you decide to buy. So don't think of this as pairing the grinder to your machine; instead, I'd recommend going for the best grinder from these suggestions that your budget will stretch to, regardless of the machine you're pairing it with.
Grind Settings: Infinite stepless with 50 indications
Dosing: Single dose
Retention: Almost Zero
My Observations:
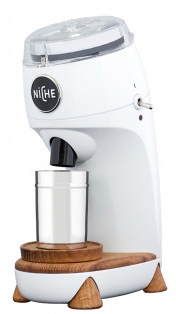
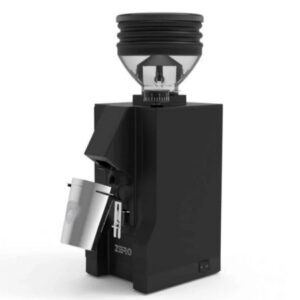
For most people, if the budget allows, the Niche Zero is probably the best espresso grinder and the best all-rounder grinder, too. So if you're not quite sure what you're looking for, and you're not fixed at a lower budget, you can't go wrong with the Niche Zero, in my opinion.
This was the first single-dose and (almost) zero retention grinder. Since its launch, an entire subcategory of single-dose and low-retention grinders has developed, but none of them are quite the Niche Zero. Here's what really sets the Zero apart from most of the contenders:
Big, high-quality conical burrs: most of the alternatives are flat burrs
No bellows: low retention by design
Clean: among the least messy grinders I've used
Quiet: one of the quietest grinders on the market
PAF: the “partner approval factor” is high with the zero, it's not big, ugly or noisy
Fine-tuning: the large stepless adjustment dial allows for very fine adjustment
High torque: I've never come across a bean that the Zero can't cope with
Conical vs flat burrs isn’t a massive deal in my opinion, but it’s worth a mention. If you’re into classic, bold, big-bodied espresso, conicals make more sense in theory. If you prefer brighter, more complex shots from lighter roasts, people often go for flats, as they’re supposed to offer more clarity.
That’s the theory. In practice, I’ve never been able to reliably taste the difference.
What I have noticed, using the Niche Zero (64mm conical) and DF64 (64mm flat) side by side with the same beans and machine, is the Niche tends to be slightly more forgiving with less channelling. But honestly, we’re splitting hairs. Most people wouldn’t notice much difference between flat and conical burrs.
What I really love about the Niche Zero is the workflow, in addition to knowing it won't have any issues with any beans I drop in it, and that I don't need to waste beans.
You just lift up the lid, drop in your dose, flip the switch, done. There's no need to purge beans (grind and throw away) in order to get rid of exchanged retention, but also there's no work to do (knocking knockers, pumping bellows) to acheive this, the retention is super low (like less than half a gram) due to design alone.
I'd recommend the Niche Zero for literally any espresso machine, from the most budget right up to the most premium. I've used this grinder with a huge number of machines. I pair it with my Decent DE1 XXL, and it does an incredible job, but I've made great espresso with it with entry-level machines too, including the Bambino & the Stilosa. See my Niche Zero review for more in-depth info.
Dimensions: 13.4 cm wide x 23.2cm deep x 35,4 cm tall
Burrs: 83mm flat hardened steel burrs. Choice of espresso or filter burrs – or both. Fast swap system
Grind Settings: Infinite stepless with 50 indications
Dosing: Single dose
Retention: Almost Zero
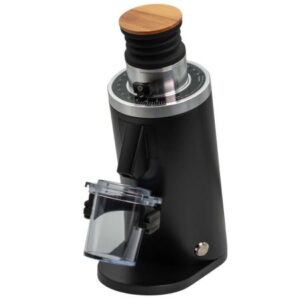
My Observations:
In a nutshell, the duo is the flat burr sibling of the Zero. Everything else is pretty much the same, but it's a bit bigger, and it has 83mm flat burrs. If you're someone who prefers flat burrs to conical, but you want the workflow of the Niche Zero, this is probably for you.
You can buy it with the espresso burrs, or with filter burrs, or buy with both, and there's a fast swap system to switch out the burrs.
I've got the Duo as well as the Zero. I really like it; the only downside is that it grinds quite a bit slower than the Zero. We're only talking a difference of 10-15 seconds, so it's no big deal, but if it were me, if I didn't notice any difference in taste between flat & conical burrs (which I dont when using the same beans and same machine with the Duo vs the Zero) I'd probably go for the Zero.
If you're someone who has a thing for flat burrs, though, then of course the Duo would be the better option for you vs the Zero, and all the other positive stuff is more or less the same, other than it's slightly bigger.
The DF83 is the bigger (83mm vs 64mm burrs) version of the D654, basically. If you had your heart set on an 83mm flat burr grinder and you were looking for a single-dose grinder with low retention, this grinder is probably on your radar.
My only issue with the DF83 to be entirely honest, is that I don't like it as much as the Niche Duo, when it comes to noise and workflow, and it's roughly the same price.
It's quite loud, noticeably louder than the Niche Duo and the DF64. Also, I'm not a massive fan of the workflow, having to pump the bellows is a bit of a pain, I sometimes find they fall off and cause me to say very rude words.
When it comes to DF64 vs Niche Zero, I do get why so many people choose the DF64; it's about £150 cheaper and offers multiple burr set options. With the DF83, though, I can't see a clear benefit vs the Niche Duo, unless some people just prefer the way it looks & prefer the bellows. Each to their own, I suppose ;-).
Burrs: 64mm Red speed DLC flat hardened steel burrs
Grind Settings: Stepless with 90 indications
Dosing: Single dose
Retention: Almost Zero
My Observations:
The DF64 is a 64mm flat burr grinder, with almost zero retention & with stepless adjustment. It's the DF83's smaller (but earlier released) sibling.
Where it really stands out is value for money, and the wide range of different compatible 64mm burrs available. The current version also has a plasma generator to deal with static and further reduce retention with or without pumping the bellows.
The DF64 was the first real contender for the Niche Zero's throne, and it's probably still the best alternative in my opinion, in terms of offering clear benefits for very specific users.
If you want to single dose, you have a hard limit of £400, you prefer flat burrs over conical, and you like the idea of having a choice of burrs, then this is probably for you.
If anyone tells me they want a single-dose grinder and they can't stretch to £550, my first reply is always DF64.
This is one of Eureka's latest addition to the hugely popular Mignon range, and it's designed for low retention, and either for traditional hopper use or single dosing. If you're on the fence between single dosing and traditional hopper use, this is one to look at. It has a small hopper (100-150g) and short bellows.
It's a very solid grinder, with loads going for it including a big adjustment wheel with a revolution counter, so it's stepless but it's easy to get back to a very specific grind size, within a big range. It has an enclosed dosing cup which reduces mess, an anti chaff chute which does the same plus helps with the low retention. It's very low (usually about half a gram) even without pumping the bellows.
It comes with their “Italian Espresso Taste” burrs, designed for traditional espresso with medium/dark to dark roasts. They also have an optional “Espresso Speciality” burr set for espresso with light to medium roasts, and “Brew Speciality” burrs for manual brew methods with light to medium roasts.
My one negative comment when I tested this, was how the wooden base shifts around slightly. Other than that, I really like the single dose pro. It hasn't taken the Niche Zero's crown for the best single doser grinder in my opinion, I still prefer the Niche, personally, but if you like the idea of being able to either single dose or keep 100g or so in the hopper, if you like the idea of burr choice, and/or you wanted flat burrs, then this might be the perfect grinder for you.
If you were thinking about going for a single doser, the Mignon Zero is a very solid choice at this price point. RRP is £399, but I've seen Clumsy Goat selling it for under £300 when they have a deal on, I think it's very difficult to beat for that price.
It's a very solid little grinder, quiet, low retention, and as with the single-dose pro, it's great if you're not sure if you want to single-dose or not.
It features the same 55mm flat burrs that the Eureka Mignon Specialita is famous for. In fact you may as well take this suggestion as 2-in-1 ;-). Instead of writing a separate section for the Specialita, I may as well just point out that the Mignon Zero is basically the same as the Specialita, but with the short hopper with bellows, and without the digital screen & the two programmable dose options that come with the Specialita.
This is the smaller, lower-cost sibling of the DF64, and it's one of the best-selling espresso grinders right now, for very good reason.
It's just incredible value for money. If you're looking for a low retention single-doser grinder for espresso with stepless adjustment, with a budget of £250 I'm just not sure what else you'd go for.
If you have a bigger budget, then there are other options, but purely for espresso, for this price, I'm not seeing any real competition.
I think if you have a budget of £200-£250, and you're looking for the best investment purely for espresso, this is it. Low retention, stepless adjustment, fairly quiet, not too messy, nice & solid, and comes with a UK warranty from Bella Barista, I'm not sure what more you could ask for at this price.
This is the espresso specialist version of the famous Baratza Encore, featuring a grinding range with 20 out of the 40 steps at a finer range, which is very clever.
It comes with a dosing cup with a gasket, making it work with various portafilter sizes, and it comes with a hopper, but you can buy a single-dose attachment from Baratza.
It has decent burrs, the same M2 burrs found in the Barista Pro & Barista Touch Impress for example.
For the price, this is the best espresso grinder (will also grind for manual brew methods) you'll get for about £150. Baratza are a very well known grinder brand, too, renown for their support in America, and they've brought that same level of support over to the UK.
So, if my budget was about £150, and I couldn't be persuaded to spend more on the grinder, this is what I'd be going for.
In a nutshell, while the Smart Grinder Pro isn't my favourite espresso purely for espresso, it's hard to beat for around the £2oo price tag when it comes to all-around use.
If you're looking to grind for a big range of brew methods, including espresso, for this price tag, you won't find a better all-rounder.
Where it really stands out is the slipper clutch as a failsafe to prevent stripped gears, and the internal top burr adjustment. The former will probably save you the hassle of replacing the gears (only a tenner but a pain to replace) if it encounters a stone or a particularly dense bean. The latter is designed for adjustment as the burrs wear, but it works well for calibration.
Purely for espresso, the ESP wins by a nose, due to the smaller adjustments in the espresso range, but the SGP is probably the most solid and user-friendly grinder at this price point, too.
I'm not going to give a separate review for the Dose Control Pro. By the way, all you really need to know is it's more or less the same grinder, but without the slipper clutch and the digital display.
These machines sit right between full manual and full automation; the sweet spot for people who want proper espresso without juggling grinders, tampers, and technique on day one. With built-in grinders, assisted dosing, and sometimes automated milk steaming, they retain much of the portafilter workflow while removing many of the early frustrations of manual espresso.
They’re not as effortless as bean-to-cup machines, and they won’t give you the full level of control (or nerdiness…) that a true home-barista machine does, but for many people, they strike the perfect balance of quality, convenience, and learning curve.
Espresso Machine With Integrated Grinder: Winner Under £700
There’s basically nothing worth talking about under £500 in this “in-between” category. There’s a big jump from the cheaper integrated machines to the proper home-barista-capable stuff. That’s where the Barista Express Impress comes in: same core espresso potential as the hugely popular Barista Express, but with built-in help for dosing and tamping so you don’t have to become a full-time coffee nerd to get decent results.
Why it wins: Because it’s the sweet spot if you want fresh-bean, “real” espresso with a proper portafilter, but you’d like Sage to handle the faffy bits of dosing and tamping for you, especially when you’re half asleep in the morning.
Machine type: Barista-assisted, integrated grinder, semi-automatic traditional espresso machine (not a bean-to-cup)
Grinder: Built-in conical burr grinder
18 external grind settings
Internal micro-adjustments for extra fine-tuning
Impress Puck System:
Assisted dosing: the machine “remembers” how much to grind
Assisted tamp: built-in lever applies consistent tamp pressure
Feedback lights tell you if you need more or less coffee next time
Water heater: Sage thermocoil (not ThermoJet)
Brew control:
PID-controlled brew temperature, with a few hotter/cooler steps
Low-pressure pre-infusion
15-bar pump with 9-bar OPV in the basket
Portafilter & baskets:
54 mm portafilter
Single-wall (standard) baskets for fresh beans
Dual-wall (pressurised) baskets for supermarket / older beans
Milk steaming:
Pro steam wand with single-hole tip
Capable of proper microfoam once you get your technique down
Water tank: 2.0 L removable tank with handle
Interface & body:
Physical buttons plus the Impress dosing/tamping lever
Pressure gauge
Large drip tray with tool storage
My Observations
If the original Barista Express is the “entry ticket” into the home-barista world, the Barista Express Impress is the version that sneaks you in past most of the queue. You still get a real portafilter machine with a proper grinder and standard baskets, but the Impress puck system quietly takes over two of the most important (and most easily messed-up) jobs: how much coffee goes in, and how it’s tamped.
Usually, with fresh beans and single-walled baskets, you’d have to juggle grind size, dose weight, and tamp pressure. All three of those can go wrong in different ways. With the Impress, you lock in your grind size, let the machine learn the dose, and the tamp lever gives you a consistent tamp each time. You still need to pay attention to shot times and taste, but the early frustration of wildly inconsistent pucks is massively reduced.
The nice bit is that this isn’t a one-way street into “press the button and forget it” territory. If you want to go full geek, you can still do so: use scales, tweak the grind size manually, ignore the lights, and treat it as a normal Barista Express with a slightly posh built-in tamp station. If you’re in a rush, you go back to letting it do its thing.
Compared to the regular Barista Express, the cup potential is basically the same; it’s the workflow that’s different. Same general grind range, same thermocoil, same 54 mm portafilter, and low-pressure pre-infusion. The difference is that fresh-bean espresso with the standard baskets is much more approachable for beginners, partners, or anyone who just doesn’t want to think about tamp pressure before 8 am.
It’s not a push-button bean-to-cup machine; you still have to purge, steam milk, clean the wand, and do a bit of basic barista-ing. But if you like the idea of learning without feeling punished for every small mistake, it hits a really nice balance.
What I Like
Massively reduces the learning curve with fresh beans & single-wall baskets.
Dose + tamp assistance, but you can still go full “geek mode” if you want.
Same core espresso potential as the Barista Express – just easier to get there.
Proper low-pressure pre-infusion & 9-bar OPV for “real” espresso, not just “espresso-style” coffee.
A pro steam wand that can produce genuinely good microfoam.
Great “one machine for the household” option when one person is keen, the other just wants coffee.
What I Like Less
Still thermocoil-based – not as “serious” as a separate grinder + boiler machine.
54 mm ecosystem, so accessories are slightly more niche than 58 mm (though there are loads available now).
You do still need decent beans and a bit of patience – it’s not a magic café in a box.
If you’re already confident with dosing and tamping, the Impress system is more “nice to have” than essential.
Final Verdict, And Who is the Barista Express Impress For?
The Barista Express Impress is ideal if you want proper, fresh-bean espresso at home from a traditional portafilter machine, but you’d like the machine to shoulder some of the barista workload.
It’s perfect if:
You’re new to home espresso and want to use fresh beans and standard baskets without a brutal learning curve
You like the idea of playing barista at weekends, but want something more forgiving and semi-assisted on busy mornings
You’re sharing the machine with someone who just wants decent coffee and zero fuss
If you already love weighing every dose, obsessing over tamp pressure, and you want full manual control from day one, you might be just as happy (and a bit richer) with the regular Barista Express or Barista Pro.
But for most people looking under ~£700 in this category, the Barista Express Impress is the most balanced “have your cake and drink it” option on the market right now. Read My Sage Barista Express Impress full review →
Espresso Machine With Integrated Grinder: Runner-up Under £700
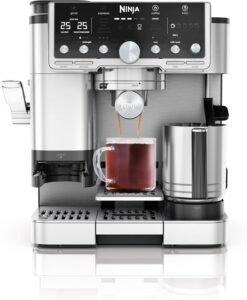
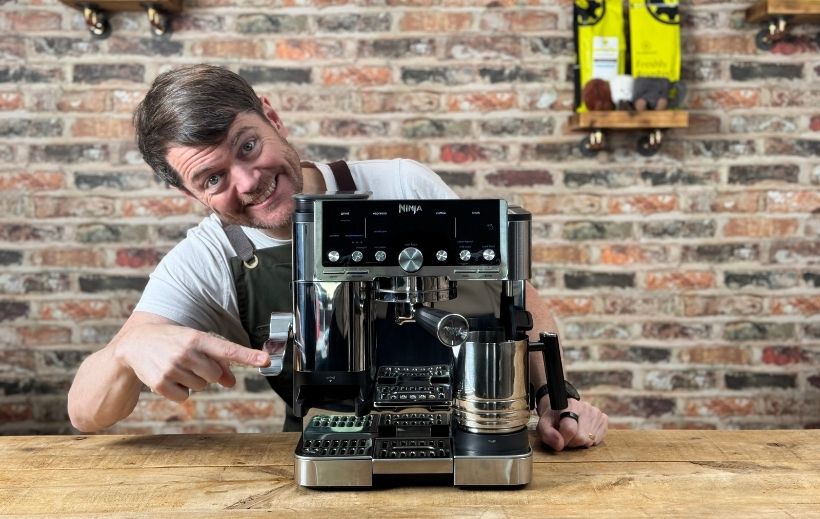
The Ninja Luxe Café Pro 701 is basically what happens when someone at Ninja says, “Let’s put a Starbucks in their kitchen.”It’s an integrated grinder espresso machine with a tamp lever, barista guidance, auto milk, cold foam, cold brew-style, filter-style coffee, and a huge drink menu; all aimed squarely at people who want fun, variety, and convenience more than obsessing over every last gram and second.
Why it’s the runner-up: Because if the Barista Express Impress is for people who want to learn “proper espresso” with a helping hand, the Ninja Luxe Pro 701 is for people who want all the drinks with as little faff as possible: iced lattes, cold foam, “filter”, “cold brew”-style, espresso cocktails – the whole café playlist.
Features
Approx. price: RRP ~£699.99 (often less when discounted)
Designed for freshly roasted beans and traditional baskets
Portafilter & baskets:
53 mm portafilter (deep design)
Single & double traditional baskets
“Luxe” deep basket for quad shots / larger brews & cold-brew-style drinks
Drinks & brew modes:
Espresso: single, double, quad
Ristretto & lungo (i.e. shorter / longer espresso ratios)
Filter-style coffee
Cold brew-style coffee
Cold-pressed espresso (great for cocktails)
Cold milk foam
Barista assistance:
On-screen guidance for what grind size to use
Tells you when to adjust the grind based on shot performance
Tamping & workflow:
Built-in tamp lever for fast, consistent tamping
Milk system:
Auto hot milk frothing (3 foam levels)
Auto cold foam
Manual steam mode for more control
Chunkier wand – cooler to touch, easier to wipe clean
XL milk jug (around 350 ml before stretching – enough foam for big lattes or two drinks)
Water & heating:
2 L water tank with a low-level sensor
Fast heat-up, effectively “ready to go” almost instantly
Hot water button with dedicated spout & temp options (for Americano/tea)
Other bits:
Big cup clearance (travel cups fit easily)
Brew temperature options & strength (ratio) settings
“Barista lights” to illuminate your shot and milk while you work
My Observations
The Luxe Café Pro 701 is not trying to be a shrunk-down speciality café machine like a Lelit or a Sage Dual Boiler. It’s playing a different game: maximum versatility and fun, minimum friction.
You get a huge menu out of one box: espresso, long drinks, filter-style coffee, cold brew-style, cold foam for iced lattes and frappé-ish creations, plus cold-pressed espresso for cocktails. If your mental picture of “café” is more Starbucks or Costa than indie third-wave shop with single-origin Kenyan on EK43, you’re exactly who this thing is aimed at.
The tamp lever is a big deal. Compared with the Premier 601’s funnel-and-hand-tamper faff, the 701’s lever makes the workflow closer to “grind, pull lever, lock in, brew”, which is what most people actually want at 7 am. Add grind-size hints on the screen, and you’ve got a machine that gently nudges you towards decent extractions without demanding that you become a full-time barista.
Shot volumes are much more consistent than early 601s, and ristretto/lungo give you more ratio flexibility (and a neat way of getting closer to a proper 1:2 espresso). It’s still not a precision nerd machine, but for the target user, it’s “close enough” in a pleasing way.
On the milk side, texture is good, and the auto options are genuinely helpful, though automatic milk temperature can wander a bit, sometimes a touch cooler, sometimes hotter than ideal. The good news is you can always switch to manual steam and finish the milk yourself if you’re fussy.
The trade-off is precisely what you’d expect: lots of electronics, lots of modes, lots of internal purging. The drip tray fills fairly quickly if you’re steaming regularly, and in the long term, there’s simply more that could go wrong than on a simpler machine like the Barista Express Impress. But that’s the price of “do everything” convenience.
What I Like
Tamp lever massively improves workflow vs the 601 – less mess, less faff.
Barista guidance on grind size makes it very approachable for non-nerds.
Proper traditional baskets designed for fresh beans, not just pressurised “cheat” baskets.
Auto milk + cold milk foam = brilliant for iced drinks and milky coffees.
Big travel-cup clearance and a hot water spout – much more “daily driver” friendly.
Feels like having a chain coffee shop menu in your kitchen.
What I Like Less
Auto milk temperature can be inconsistent – sometimes lukewarm, sometimes a bit too hot.
The drip tray fills quickly, especially if you’re steaming a lot of milk.
More “jack of all trades” than a precision espresso machine – not ideal if your main goal is perfect shots.
53 mm ecosystem is less standard than 58 mm (though you don’t need many extra accessories with this machine).
Long-term reliability is harder to predict vs simpler, more “old-school” setups.
Final Verdict, And Who is the Ninja Luxe Café Pro 701 For?
The Ninja Luxe Café Pro 701 is perfect if you:
Want a “Starbucks at home” machine with loads of hot and cold drink options
Care more about variety, convenience, and fun than about chasing god-shots with single-origin light roasts
Love the idea of barista-style drinks but don’t want to manually dose, tamp, and steam perfectly every single time
Make lots of iced lattes, caramel-y drinks, big milky drinks, and the occasional espresso cocktail
If your main goal is learning proper espresso and slowly levelling up your barista skills, the Sage Barista Express Impress still takes the win in this price band.
But if what you really want is a feature-packed, café-style, “give me all the drinks” machine that still uses fresh beans and a real portafilter, the Ninja Luxe Café Pro 701 is a seriously compelling runner-up. Read My Ninja Luxe Café 701 Pro full review →
Sage Barista Express Impress Vs. Ninja Luxe Café Pro 701: Comparison Table
Feature
Sage Barista Express Impress
Ninja Luxe Café Pro 701
Machine type
Integrated grinder, semi-automatic traditional espresso machine with assisted puck prep (Impress Puck System).
Integrated grinder, barista-assisted espresso machine with a big “café style” drinks menu (hot & cold).
RRP £699.99 – often discounted (usually mid-£600s when on offer).
Integrated grinder
Built-in conical burr grinder, ~25 external grind settings + internal burr adjustment; well suited to espresso with fresh beans.
Built-in conical burr grinder with 25 grind settings; designed specifically for freshly roasted beans and traditional baskets.
Portafilter & baskets
54 mm portafilter with both standard (single-wall) and pressurised baskets – flexible for fresh beans or supermarket coffee.
53 mm deep portafilter with traditional baskets only (single & double) plus a “Luxe” deep basket for quad shots / bigger brews & cold-brew-style.
Heater & warm-up
Original Sage thermocoil system; ready to brew in ~30 seconds, but benefits from a quick flush to fully heat group & portafilter.
Fast “almost instant” heat-up; pre-heats on demand when you brew – feels very much like a quick-start café appliance.
Pump & pressure control
Vibration pump with 9-bar OPV and PID-controlled brew temp; low-pressure pre-infusion via pump modulation; 3-way solenoid for dry-ish pucks.
Pump-driven system tuned for traditional baskets; user-selectable brew temp steps. More “café appliance” than purist 9-bar nerd machine.
Pre-infusion & puck prep
Firmware-controlled low-pressure pre-infusion + the Impress Puck System (auto dosing & assisted tamp for consistent pucks).
Volumetric espresso with barista assistance that tells you which grind size to change to; standard tamp pressure via lever (no built-in scale, but very repeatable).
Tamping system
Integrated Impress tamp lever with dose sensing; automatically adjusts grind time to hit the sweet spot over a few shots.
Built-in tamp lever in the grinding cradle – quick, clean and consistent vs manual tamp + funnel on the 601.
Milk system
Manual “pro” steam wand (single-hole tip). Great for learning real microfoam; no auto-milk – you control texture & temp.
Auto & manual hot milk frothing plus auto cold foam. Chunkier wand runs cooler to the touch and is easier to wipe; XL jug for bigger drinks.
Drinks & versatility
Classic espresso menu: espresso, Americanos (via hot water), and milk drinks (flat white, latte, cappuccino, etc.). No cold brew or cold foam modes.
Very broad menu: espresso, ristretto, lungo, quad shots, filter-style coffee, cold-brew-style, cold-pressed espresso & cold foam – very “Starbucks at home”.
Barista assistance & learning curve
Assists with dosing & tamping, but no grind-size guidance. Great if you want to learn espresso but still keep some help with consistency.
Strong “hand-holding”: on-screen guidance suggests grind changes based on how shots are pulling. Ideal if you want the machine to do more of the nerdy thinking.
Workflow & convenience
Very “espresso-centric” workflow. Great for people happy to steam manually and focus on a smaller set of café-style drinks.
Built for convenience: tamp lever, auto milk, barista lights, large cup clearance, hot water button. Drip tray fills a bit quicker due to auto purges, especially with lots of milk drinks.
Who it’s best for
Home-barista-curious users who want proper espresso with fresh beans and real microfoam, but appreciate help with dosing & tamping. More “indie café” than chain coffee shop.
Users who want a café-style menu at home (hot & cold, lots of variety) with minimal faff – think Starbucks-style drinks, iced lattes and cold foam on tap.
Category 3: Bean-to-Cup Espresso Machines (internal brew unit, push-button espresso)
Bean-to-cup machines are the most convenient way to make coffee at home: just add beans, press a button, and the machine grinds, doses, tamps, brews, and disposes of the puck automatically. Unlike “in-between” machines like the Barista Express Impress or Ninja Luxe Café, you don’t use a portafilter or develop barista skills; everything happens inside the machine.
This makes bean-to-cup ideal for people who want speed, consistency, and zero fuss, especially in busy households or offices. The trade-off is cup quality: because these machines use internal brew units, coarser grinds, and higher brew ratios, the result is usually more like a lungo or café crema, pleasant and smooth, but not the same thick, punchy, true espresso you can achieve with barista-assisted or manual machines. Read My Best Bean-to-Cup Machine review →
The De’Longhi Magnifica S is the go-to budget bean-to-cup machine in the UK for a reason. It’s compact, simple to live with, and will happily churn out decent long coffees and milky drinks all day with very little faff, as long as you feed it half-decent beans and spend a bit of time setting it up.
Why it wins: because under £300, there’s very little that gives you freshly ground coffee at the touch of a button with this combination of reliability, ease of use, and surprisingly good milk steaming (once you ditch the panarello).
Features
Approx. price: RRP ~£349, often discounted to well under £300
Grinder: Built-in burr grinder with multiple grind settings
Water tank: Front-access tank (handy under wall cupboards)
Controls:
Strength dial (grind dose)
Programmable single & “double” coffee buttons (volume)
Coffee styles:
Espresso / “long coffee” (Americano-style) at one touch
Manual milk drinks via steam wand
Steam system: Panarello “turbo frother” that can be removed so you can use the bare steam pipe as a more “pro” wand
Pump: Vibration pump (fairly quiet for a bean-to-cup)
Size: Compact footprint – approx 24 cm wide, ~35 cm deep, ~43 cm tall with hopper lid
My Observations
This is very much a workhorse machine: press a button, it grinds, doses, tamps internally, and spits out a long coffee or espresso-ish drink with very little drama. In terms of pure cup quality, it’s about as good as you’ll get from a “real” bean-to-cup at this price – most of the more expensive machines in this segment are using very similar internal brew units.
Out of the box, you’ll need to:
Run a few “sacrificial” coffees while the brew unit sorts itself out.
Set the grind nice and fine (changing the grind only while the grinder is running).
Dial in your preferred ratio by re-programming the single-shot button.
Once that’s done, it’s basically a one-button routine for your daily coffee.
The controls are better than the old ESAM 4200 (strength dial + programmable buttons), but still a bit “guessy”: no clear markings for how many grams each strength setting uses. And the “double shot” button is really just more water and only a bit more coffee, not a proper double.
Where it really over-delivers for the money is milk: if you slide off the panarello and use the bare pipe, steam power is actually decent for a bean-to-cup, and you can get something approaching microfoam with a bit of practice.
What I Like
Very good value under £300 for a true bean-to-cup machine
Coffee quality is on par with many machines that cost a lot more
Front-access water tank – great for under-cupboard setups
Grinder has more adjustment than some pricier rivals
Steam power is surprisingly capable once you remove the panarello
Compact and fairly quiet (for a vib-pump bean-to-cup)
Strength dial has no clear reference marks – hard to “remember” your setting.
The double-shot button isn’t a real double – more water, only slightly more coffee.
You’ll probably end up pressing the single-shot button twice for a proper double.
Long coffee runs all water through the puck, so it’s not espresso + fresh hot water.
Out-of-box shots can be weak until you’ve dialled in grind and volume.
It’s still a bean-to-cup brew unit: nice, smooth coffee, but not café-level espresso.
Final Verdict, And Who is the De’Longhi Magnifica S For?
The Magnifica S is ideal if you want freshly ground coffee at the push of a button, mostly drink Americanos/long coffees or simple milkies, and don’t want to learn home-barista workflows. It’s the sweet spot for: tight budgets, busy households, and people upgrading from pods or instant who just want “better coffee, easily”.
If you’re dreaming of super-dense, café-style espresso and silky flat-white microfoam, an integrated barista-assist machine (like the Barista Express Impress or Ninja Luxe Café) or a manual machine + separate grinder will give you more potential. But as a sub-£300 bean-to-cup workhorse, the Magnifica S is very hard to beat. Read My De'Longhi Magnifica S full review →
Bean-to-Cup Espresso Machine: Runner-up under £300
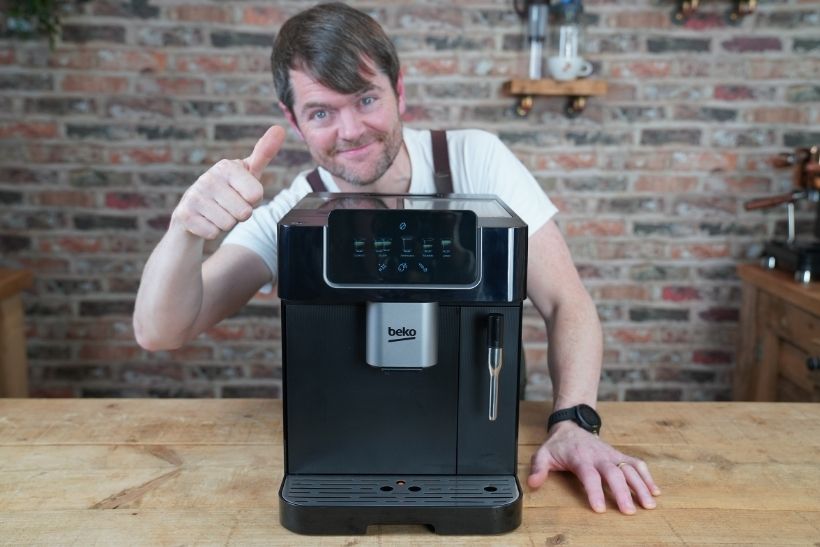
If you want a modern, touch-screen bean-to-cup machine under £300 and you regularly swap between regular beans and decaf or pre-ground, the Beko CaffeExperto is a bit of a hidden gem. It looks like a much more expensive machine than it is, pulls surprisingly punchy espresso for this price bracket, and has some very clever usability touches that make day-to-day life easier.
Why it’s the runner-up: because it’s brilliant value, very user-friendly, and unusually flexible with pre-ground/decaf, only really losing out to the Magnifica S on brand trust and long-term “known quantity” status.
Features
Approx. price: Typically under £300 when on offer
Type: Bean-to-cup espresso machine with touch-screen interface
Dimensions (W × D × H): 27.5 × 40 × 34 cm (about 36 cm at the front including screen)
Heater: Thermoblock
Water tank: 2 L, rear accessed
Grinder: Built-in with 13 grind settings
Bypass chute: Yes – for pre-ground coffee (or your own pre-ground decaf hack)
True double shots: Yes – grinds and brews two back-to-back singles for a proper double
Milk system: Panarello wand, with a simple “cover the air hole” trick to use it like a more pro wand
Max cup height: Up to 14 cm (good for taller mugs)
Grounds bin: Holds around 10 pucks, very easy to access
Interface: Bright, responsive touch screen with clear icons
Extras & smart touches:
“I started, so I’ll finish” – if it runs out of water mid-shot, you can top up and it carries on
Barista lights that illuminate your drink while brewing
Hot milk mode with cut-off around ~90°C
My Observations
I was expecting a very basic, slightly flimsy budget bean-to-cup from Beko and was honestly taken aback by how solid and refined this feels for the money. Yes, it’s plastic, but the doors, tank, and hopper lid all feel more “mid-range” than bargain-basement, and the screen is genuinely nice to use, bright, responsive, and intuitive.
In terms of espresso intensity, it’s one of the punchiest automatic bean-to-cup machines I tested at this level, especially at max strength. If you’re chasing something closer to traditional espresso from a fully automatic brew unit, this is a better bet than a lot of the competition; you can always dial it down if you don’t want it that intense.
The milk steaming workflow is brilliant: tap once to purge/heat, then it waits until you tap again to actually steam, so you’re not rushing. Covering the little air intake hole basically turns the panarello into a pseudo-pro wand, giving you more control over texture if you want to move away from stiff foam.
The pre-ground/decaf hack is genuinely clever: if you cancel just after grinding (and keep the drawer dry/clean), the machine dumps the dry grounds into the internal bin. That means you can quickly grind your own decaf or 50/50 blend into the drawer and use it via the bypass, without being stuck with supermarket pre-ground.
It’s not perfect, the “Americano” option is really just a very long espresso, and Beko as a coffee-machine brand doesn’t have the long track record of De’Longhi or Gaggia – but purely on what you get in front of you for the money, it’s very impressive.
What I Like
Great value for a touch-screen bean-to-cup under £300
The build quality feels more expensive than the price suggests
Very simple to use – interface is clear, logical, and responsive
True double shot logic: grinds twice, brews twice
Pre-ground/decaf hack is fast, clean, and genuinely useful
Strong espresso potential – can get surprisingly intense shots for a fully auto
Smart steam workflow (purge/heat first, then steam when you’re ready)
Compact and relatively low height for a bean-to-cup
What I Like Less
“Americano” is really a long espresso, not espresso + fresh hot water
Rear water tank is slightly less convenient if you’re tight under wall units
Beko isn’t a well-established coffee machine brand, so long-term reliability is less proven
Only a 2-year warranty, which is fine, but not outstanding
Final Verdict, And Who is the Beko CaffeExperto For?
The CaffeExperto is ideal if you want a modern, touch-screen bean-to-cup that’s easy to live with, gives you stronger-than-average espresso, and you often switch between beans and decaf/pre-ground. It’s particularly good for households where usability and convenience matter as much as cup quality.
If you’d rather stick with a long-proven brand with a huge track record and massive user base, the Magnifica S is the safer all-round winner. But if you’re happy to be a bit more adventurous for better features and a more modern user experience under £300, the Beko CaffeExperto is a very strong runner-up.
If you want a modern-looking bean-to-cup machine that feels premium without costing a fortune, the Magnifica Evo Next is the sweet spot. De’Longhi clearly built this one for the tech-savvy coffee drinker: someone who wants touch controls, presets, a milk carafe, profiles, and convenience, without stepping up into the £800-plus range.
It’s compact, smartly laid out, and delivers consistently solid espresso with very little effort. The LatteCrema milk carafe isn’t going to give café-grade microfoam for latte art, but for cappuccinos, lattes, and flat-white-style drinks, it’s one-touch convenience at its best. Espresso strength is among the better results you’ll get from a true bean-to-cup system, especially at this price.
Features
Approx. price: ~£500
Type: Fully automatic bean-to-cup with milk carafe
Dimensions (W × D × H): 24 × 44 × 36 cm
Heating system: Thermoblock
Water tank: 1.8 L (front access great for low cupboards)
Grinder: Built-in 13 grind settings
Strength settings: 4
Milk system:Latte
Crema one-touch hot milk carafe
True double shots: (double uses a larger single dose, not a full double grind)
The Evo Next feels like the spiritual successor to the iconic ECAM 4200, but dressed for 2025. It’s compact, looks great on the counter, and feels reassuringly well-built. The interface is smooth and intuitive, with quick-select icons for espresso, cappuccino, latte, lungo, and more, much faster than scrolling menus.
Espresso is surprisingly punchy for a fully automatic, and flavour intensity is decent when paired with fresh beans and a finer grind setting. Like most bean-to-cup machines, it won't produce true café-style 1:2 espresso, but it gets closer than most under £500. The biggest standout is convenience, especially the milk system and three selectable user profiles, which is rare at this price.
The only somewhat annoying bit? The “double shot” isn’t a proper double dose, just a volume increase with only a slightly higher bean dose. Not a deal-breaker, but worth knowing.
What I Like
Great value for the feature set
Compact fits easily under cabinets
Modern touchscreen interface is fast and beginner-friendly
User profiles (x3) ideal for households sharing the machine
Solid milk temperature (among the hottest tested)
Espresso intensity is good for a full-auto system
Front water-tank access makes daily use much easier
What I Like Less
Carafe is on the small side (280 ml max)
Not a true double-shot workflow (grinds once, not twice)
Milk texture is cappuccino-style rather than silky latte-art microfoam
Final Verdict, And Who is the Magnifica Evo Next For?
The De'Longhi Magnifica Evo Next is easily the best all-round bean-to-cup machine under £500 for most people, especially if you value touchscreen convenience, one-touch milk drinks, simplicity, and reliability.
If you want a modern machine that's easy to live with, consistently produces good coffee, and looks the part in a modern kitchen, this one is very hard to beat for the price. Read My De'Longhi Magnifica Evo Next full review →
Bean-to-Cup Espresso Machine: Runner-Up Under £500
If you prefer simple buttons over touchscreens, value reliability over gimmicks, and want a bean-to-cup machine that just gets on with the job, the Gaggia Anima is the no-nonsense alternative to the more modern-looking Magnifica Evo Next. It feels like a machine designed for people who want control, clarity, and longevity, not flashing icons and app-style interfaces.
Despite its straightforward look, it offers impressive flexibility, especially around dose control, volume programming, and milk options, and unlike many machines in this price range, a double shot actually means double coffee, not just double water.
Features
Approx. price: ~£450–£500 (depending on model version)
Type: Semi-automatic bean-to-cup (manual milk)
Dimensions (W × D × H):22.1 × 43 × 34 cm
Heating system: Thermoblock
Water tank:1.8 L top-filling
Grinder: Built-in with 5 grind settings
Strength settings:5 (7–11 g dose per shot)
True double shots: Yes (grinds twice)
Bypass chute for pre-ground: Yes
Cup clearance: Up to 15 cm
Waste bin capacity: ~16 pucks
Milk system options:
Standard: Panarello wand
Or choose versions with pro steam wand or milk carafe (varies by model)
My Observations
The Anima feels reassuringly solid and purposely simple. The physical buttons give satisfying feedback, programming shot size is intuitive, and choosing dose strength is as straightforward as tapping through bean icons, no guessing, no cryptic menus. Espresso quality is strong for a bean-to-cup system, particularly thanks to Gaggia’s clear dosing control and the ability to brew proper back-to-back double shots.
Milk steaming depends on the model; the base Panarello version is easy but produces classic cappuccino-style froth. If you’d like latte art-style foam, the Barista Plus version with the pro steam wand is worth choosing.
What I Like
True double-shot workflow (rare at this price)
Clear, predictable dose control (7–11 g per shot)
Buttons instead of touchscreens: fast, reliable, familiar
Slim footprint (only 22 cm wide)
Multiple milk configurations depending on preference
Simple programming: no learning curve
Well-known reputation for longevity and repairability
What I Like Less
The top-fill water tank may be awkward under cabinets
No gasket on grinder lid: could be quieter with one
Fewer grind settings than some alternatives
The Panarello wand isn’t ideal for latte art unless upgraded
Final Verdict, And Who is the Gaggia Anima For?
The Gaggia Anima is the perfect choice if you want a reliable bean-to-cup machine under £500 that prioritises durability and straightforward usability over modern UI flair. It brews stronger espresso than many machines in this range, supports proper double shots, and lets you choose the milk system that suits your workflow.
If the Magnifica Evo Next feels a little too modern or automated, the Anima is the more grounded, practical, and coffee-focused alternative. Read My Gaggia Anima full review →
The De’Longhi Rivelia is one of those machines I didn’t expect to be quite as good as the marketing would have me believe, and then I started using it, and realised De’Longhi may have just solved several long-standing bean-to-cup annoyances in one go. Dual hoppers, great milk texture, proper user profiles, strong espresso, and a brilliantly intuitive UI… this one’s a bit special.
Features
Two fast-swap bean hoppers with switch mode
12 one-touch hot coffees (+ 9 cold milk drinks with optional cool carafe)
Bean Adapt system (guided dial-in suggestion for grind/temp)
14 grind settings (finer than most bean-to-cup machines)
Fully interactive 3.5″ touchscreen interface
4 separate user profiles
LatteCrema Hot milk carafe (microfoam capable)
1.4 L water tank (front accessed)
Dimensions: 24.5 × 43 × 39 cm
Max cup height: 14 cm
Dreg drawer capacity: ~10 pucks
Why it wins: Because it’s the most complete “press a button and get café-style coffee” machine under £1,000, especially if you swap between regular beans and decaf.
My Observations
After spending time hands-on with the Rivelia, the first thing I noticed was how ridiculously intuitive it feels. The UI doesn’t just let you choose drinks, it walks you through setup, milk cleaning, grinder advice, and even taste-feedback tweaking in a way that feels almost… friendly. It’s one of the closest experiences I’ve seen to Sage’s “guided espresso” approach, but in full bean-to-cup form.
The espresso itself is among the strongest I’ve had from a bean-to-cup machine; I even managed to choke it by going too fine, which is unusual in this category. That suggests the burrs and brewing system allow a genuinely usable range of extraction, not just “coffee-ish brown liquid.”
Milk texture is what really surprised me. Most automatic milk carafes make stiff foam or bubbly mousse. This one actually produces microfoam, a proper silky texture suitable for flat whites and modern cappuccinos. The only trade-off? Milk isn’t scorching. I like it around 60°C, so this suits me perfectly, but if you like your latte approaching volcanic temperatures, this may not be your soulmate.
And then there’s the dual hopper system. This is the closest thing I’ve ever seen to a real solution for switching between decaf and full-caffeine beans without faffing about with pre-ground chutes. It works, and it works well.
What I Like
Brilliant milk texture: actual microfoam from a carafe
Dual hopper system solves the decaf vs regular dilemma
Guided Bean Adapt feature helps dial in beans properly
True double shots + extra shot button
Modern UI that feels genuinely helpful
Cold milk froth options with add-on carafe
Strong espresso: finer settings than most bean-to-cup machines
4 profiles for households with different preferences
What I Like Less
Milk temperature tops out around ~61–62°C not hot enough for some
Water tank could be bigger at this price
“Cool coffee” presets aren’t truly cold just hot coffee with ice instructions
Dreg drawer fills fast if you make lots of drinks
Final Verdict, And Who Is The De’Longhi Rivelia For?
If you want proper one-touch cappuccinos, flat whites, Americanos, and even iced drinks, without ever touching a grinder, tamper, or steam wand, the De’Longhi Rivelia is likely the best machine under £1,000 for you. It’s ideal for busy households, mixed caffeine/decaf drinkers, and anyone who values convenience without sacrificing drink quality.
It’s not the right choice if you want boiler-hot milk or if you’re chasing true espresso at a barista level; in that case, you’re better off with a manual or barista-assisted machine.
But for what it is, a genuinely modern bean-to-cup machine with clever features and unusually good milk texture, the Rivelia is outstanding value and a clear winner in this price bracket. Read My De'Longhi Rivelia full review →
Bean-to-Cup Espresso Machine: Runner-Up Under £1000
If the Rivelia is the refined, modern thinker of the line-up, the Eletta Explore is its loud, enthusiastic sibling shouting “I CAN DO EVERYTHING!”. This is the machine for households where one person wants flat whites, another wants americanos, someone else wants iced lattes, and someone (we all know one…) wants a cappuccino hotter than the surface of the sun. It’s feature-packed, flexible, and built for variety.
Why it wins: Because no other machine under £1000 offers anywhere near this level of drink flexibility, including proper iced milk drinks.
Features
Hot + cold drink capability
LatteCrema Hot and Cool carafes included
40+ drink options (hot, cold, black, milk)
Dimensions: 26 × 45 × 39 cm
Heating system: Thermoblock
2 L water tank (front-access)
13 grind settings
5 strength/dose settings
True double shots: Yes (two grind + brew cycles)
Pre-ground chute: Yes
Max cup height: 14 cm
Waste bin: ~14 pucks
My Observations
Using the Eletta Explore feels a bit like having a drinks menu from a café chain at your fingertips: espresso, latte, flat white, iced cappuccino, cold brew-style long drinks… the lot. The UI is slick, the touchscreen is easy to navigate, and having both hot and cool LatteCrema carafes genuinely opens up drink possibilities most machines can’t offer.
The espresso is solid, not the strongest I’ve ever had from a bean-to-cup, but perfectly enjoyable, especially once you tweak grind size and volume. The milk systems, though, are where this thing shines. Hot microfoam is good, and the cold frother is surprisingly useful, proper thick iced latte foam rather than sad cold bubbly mush.
It’s a bit larger than some of the others and can feel slightly overwhelming at first because of sheer drink options. But once you settle into it, it’s a fantastic machine for people who like choice.
What I Like
The most versatile machine in this price range
Hot and cold milk: great for iced lattes and frappé-style drinks
Loads of drink presets (40+)
The touchscreen interface is clear and helpful
Front-access tank makes refilling painless
True double-shot capability
What I Like Less
“Espresso Soul” feature sounds cool, but feels gimmicky
Some drink recipes force larger brew ratios
Bulky: not ideal for tight counter space
Pricey compared with simpler models
Final Verdict, And Who Is The Eletta Explore For?
The De’Longhi Eletta Explore is perfect if you want maximum versatility from a bean-to-cup machine, hot lattes in winter, iced flat whites in summer, and everything in between. If you’ve got a household of mixed preferences or you like coffee variety rather than sticking to one drink, this machine will make you very happy.
If you’re an espresso purist hunting for café-grade shots and don’t care about iced or flavoured drinks, you may be better off with a barista-assist machine or the Rivelia. But if you want a true do-everything machine under £1,000, this is one of the best you’ll find.
If most bean-to-cup machines feel like a compromise, the Gaggia Accademia is the moment someone finally said, “Right, let’s make a fully automatic machine that actually puts espresso first.” It’s premium, it’s powerful, and it’s unapologetically aimed at people who care about cup quality more than gimmicks.
Why it wins: Because it delivers the closest thing to true espresso quality you can get from a fully automatic machine.
Features
Dimensions: 28 × 43 × 39 cm
Water tank: 1.6 L, top-access
Milk system: One-touch carafe + full pro steam wand
Grind settings: 8
Strength settings: 5 (7–11g per shot)
True double shots: Yes (two full grind & brew cycles)
Grinder bypass chute (for pre-ground): Yes
Max cup height: 15 cm
Waste bin capacity: ~16 pucks
Adjustable milk texture control (rare on bean-to-cup machines)
Adjustable pre-infusion & flow control
My Observations
The Accademia feels different the moment you start using it, not just another push-button coffee gadget, but something designed by people who actually get espresso. There’s more control here than with most bean-to-cup machines: dose, pre-infusion, brew profile, milk texture, all tweakable.
And the milk system? Best of both worlds.
Want convenience? The one-touch carafe is genuinely great.
Want latte-art-worthy microfoam? Use the steam wand and go full barista mode when you feel fancy.
The espresso is bold, rich, and textured, way closer to what you’d expect from a semi-manual machine rather than a typical automated “coffee-ish” shot. And unlike most machines that pretend to make double shots, this one actually does: two full grind cycles, two extractions, just like it should be.
It’s not small, and it isn’t cheap, but it feels like the machine you buy once and don’t replace for a decade.
What I Like
Exceptional espresso quality for a bean-to-cup
True double shots: not watered-down doubles
Adjustable flow, pre-infusion & texture: rare control at this level
Dual milk options: convenience or full latte-art steaming
Built to last: feels premium and robust
Great for dialling in your favourite beans
What I Like Less
Price: premium machine, premium cost
Top-fill tank can be awkward depending on counter placement
Larger footprint than mid-range models
Small drip tray compared to the machine size
Final Verdict, And Who Is The Gaggia Accademia For?
The Gaggia Accademia is for people who want serious coffee without giving up the convenience of one-touch brewing. If you value espresso flavour, depth, and control, but still want your morning cappuccino at the press of a button, this sits in the sweet spot between hobbyist and luxury automation.
It's not for people who just want iced lattes, presets, or simplicity over performance. But if you’re willing to invest in quality and want the closest experience to a prosumer machine, without becoming a barista, the Accademia is hands-down one of the best automatic machines you can own.
High-End Bean-to-Cup Espresso Machine: Runner-Up
KitchenAid KF8
The KitchenAid KF8 is one of the most premium fully automatic bean-to-cup machines I’ve tested, and it clearly isn’t trying to blend in with the usual crowd of shiny black-and-chrome machines. It’s bold, tactile, Swiss-made, surprisingly intuitive, and very clearly built for people who want high-end convenience without sacrificing customisation or milk texture.
Why is it the runner-up: Because it delivers some of the best milk texture I’ve ever seen from a fully automatic machine, genuinely latte-art-worthy.
Features
5-inch responsive touch screen
Milk system: Cappuccinatore with milk container or bottle-fed tube
Guided cleaning with dairy & plant-based modes
10 preset drinks, plus frothed milk, hot milk & hot water (2 temperatures)
6 grind settings
3 brew temperature settings (approx. 90°C, 93°C, 96°C)
The first thing that jumped out at me wasn’t the features; it was the build. The KF8 feels premium in a way most automatic machines don’t. The matte finish, unique texture, and solid tactile presence make it feel more like a designer appliance than a generic coffee robot.
The touch screen is excellent: responsive, quick, cleanly laid out, and refreshingly un-annoying. I found it odd that you scroll using arrow taps instead of swiping, but you get used to it quickly.
Performance-wise, it’s brilliant. Espresso is rich, well-extracted (especially when using the higher body and brew temp settings), and the level of personalisation is superb. You can tweak dose, temperature, flow rate, milk order, milk type, and milk temperature; the level of control here feels closer to prosumer than fully automatic.
Milk texture? Genuinely impressive. It produces proper microfoam suitable for flat whites and latte art, better than most one-touch systems I’ve used, including some at this price.
It’s not perfect, of course. The price is steep, the firmware isn’t updatable, and the maximum milk volumes on certain drinks feel oddly limited. But overall, this is easily one of the most polished and capable high-end bean-to-cup machines on the market.
What I Like
One of the best one-touch milk textures I’ve ever tested
Gorgeous build quality and premium feel
Hugely customisable espresso and milk drinks
Removable hopper + purge system (rare and brilliant)
Price: sits at the very top end of the bean-to-cup market
No WiFi firmware updates (unusual at this price point)
Some drink limits (especially milk volume) feel unnecessarily restrictive
Slightly lower cup clearance than some competitors
Final Verdict, And Who Is The KitchenAid KF8 For?
The KitchenAid KF8 is for someone who wants a fully automatic machine with a real premium feel, exceptional milk performance, and loads of customisation, without stepping into manual espresso territory. If you want a machine that can make café-style flat whites, cappuccinos, and lattes with silky milk texture at the tap of a button, this is a very strong contender.
It’s not the right choice if you simply want convenience at the lowest price, or if you prioritise firmware flexibility and long-term software upgrades. But if you want one of the most premium, refined bean-to-cup experiences available, this is absolutely one worth shortlisting.
Category 4: Pod Espresso Machines (capsule convenience)
Pod machines are where convenience really takes centre stage. No grinders, no dialling in, no coffee scales, just pop in a capsule, press a button, and off you go with a consistent cup every time. They’re compact, low-maintenance, and often the cheapest entry point into espresso-style drinks at home.
But there are trade-offs, and they’re worth understanding before choosing one. While the machines themselves are often inexpensive, their running costs are pretty high. Most Nespresso-style pods cost around 35p–60p each, and each pod contains roughly 5–6g of coffee. That works out to somewhere in the region of £60–£100 per kilo of coffee; compare that to our £20 for a 1kg bag of freshly roasted whole beans, and the difference adds up very quickly.
There’s also the environmental consideration. Many pods are recyclable, but not all are, and even the recyclable ones often require specific recycling schemes rather than just tossing them in the household bin. So whether they're eco-friendly really depends on how disciplined you are with disposal.
So while pod machines aren’t the choice for someone chasing café-quality espresso or the lowest cost per cup, they’re brilliant for anyone who wants fast, consistent coffee with minimal faff, especially in small kitchens, holiday homes, offices, or households where no one wants to think about grind size or tamping pressure. Read My Best Pod Machines review →
If you just want simple, fast coffee at the press of a button without spending much, the L’OR Barista Sublime is one of the best-value pod machines you can get. It’s made for L’OR capsules but also works with Nespresso Original and most compatible pods, which gives you a huge range of flavour and price options.
Why it wins: Because it's one of the cheapest pod machines available that still offers flexibility, good compatibility, and adjustable cup size.
Features
Compatible with L’OR Barista capsules and Nespresso Original pods
Adjustable coffee volume (programmable shot size)
Compact footprint: very kitchen-friendly
One-touch operation
Fast heat-up time
Usually under £50 (often cheaper on offer)
My Observations
The L'OR Sublime is unapologetically simple, and that’s the point. You pop in a pod, press a button, and that's your coffee sorted. The standout feature here is the programmable volume, which means you’re not stuck with whatever the machine thinks a lungo or espresso should be, you can tailor it to taste.
Build quality is perfectly acceptable for the price, and the ability to use Nespresso-compatible pods (including cheaper supermarket versions) keeps ongoing costs a bit more controlled, which is important with pod machines.
What I Like
Very affordable entry into pod espresso
Works with a wide range of capsules
Programmable coffee volume
Small and easy to live with
Minimal learning curve: ideal for beginners
What I Like Less
No milk frother (unless you buy one separately)
Pod cost still much higher than using fresh beans
Espresso quality is decent but not comparable to manual machines
Final Verdict And Who Is It For?
The L’OR Barista Sublime is perfect for anyone looking for a cheap, compact, and fuss-free way to make coffee at home. It’s great for students, offices, small kitchens, or anyone who values convenience over brewing technique. If you want café-quality espresso or low running costs, a manual or bean-to-cup machine will suit you better, but for under £50, this is a cracking little machine.
If pod machines are all about convenience, the Sage Creatista Plus is what happens when someone decides convenience shouldn’t mean compromising on milk texture, user-friendliness, or aesthetics. This is easily one of the most premium Nespresso Original machines money can buy, and it shows.
Why it wins: Because it’s the closest you’ll get to café-style milk drinks from a pod machine, with proper silky microfoam rather than bubbly cappuccino foam.
Features
Compatible with Nespresso Original pods
8 milk texture levels & 11 milk temperature settings
If you’ve ever used the Sage Bambino Plus, this will feel instantly familiar, only instead of grinding beans and dialling in espresso, you just drop in a pod and press go. The steam wand is the star of the show here. Unlike most pod machines that rely on spinning whisk frothers (and produce airy, bubbly milk), the Creatista Plus uses a real steam wand capable of flat-white-worthy microfoam.
Temperature control is far better than you'd expect from a pod system, and the user interface feels quintessentially Sage: intuitive, friendly, and designed to make life easier rather than overwhelming you with tech for tech’s sake.
As for the espresso, let’s be honest: pod espresso isn’t “true” espresso. It’s an espresso-style beverage. But for many people, especially those who don't want to grind beans or think about extraction, pod coffee is more approachable and consistent, and paired with this steam wand, it makes properly satisfying drinks.
The only real con is the price; this is one of the most expensive pod machines on the market. But when it’s on offer, it becomes a very tempting option for anyone who loves milk drinks but doesn’t want the learning curve of manual espresso.
What I Like
Best-in-class milk texture from any pod machine
Super fast heat-up time (ready in 3 seconds)
Very easy to use, classic Sage user interface
Loads of milk control: texture + temperature
Premium design and build quality
Great option for flat whites, cappuccinos & lattes
What I Like Less
Expensive for a pod machine
Requires occasional steam-wand maintenance
Doesn’t compete with true espresso machines in flavour depth
Final Verdict And Who Is It For?
The Sage Creatista Plus is perfect for anyone who mostly drinks milk-based coffees and wants great results with zero faff. If you love cappuccinos, flat whites, and silky latte texture, but you don’t want to learn the workflow of a manual espresso machine, this is the easiest and most satisfying pod-based solution out there.
It’s not the right choice for someone chasing true espresso or the lowest running costs, but if you want the premium, push-button café experience from pods, this is the machine to beat. Read My Sage Creatista Plus Full review →
Category 5: Small Espresso Machines
Small espresso machines are designed to deliver real espresso-machine performance while fitting into compact kitchens, apartments, or minimal spaces. Typically, they measure around 20–30 cm wide, 30–40 cm tall, and 40–45 cm deep, making them much easier to place under cabinets or on narrower countertops than full-size prosumer machines. The idea is: full portafilter control, proper espresso shots, but in a footprint that’s accessible, convenien,t and less intimidating for everyday use.
For our three picks, the De'Longhi Dedica EC685, Sage Bambino, and Lelit Mara X, you’re looking at scaling down size and cost, not necessarily reducing capability. They’re ideal if you want “real espresso” in a small space and without massive financial or spatial commitment.
The De’Longhi Dedica EC685 is the classic “first proper espresso machine” for a lot of people – a super–slim, lightweight traditional espresso machine that’ll actually fit in small kitchens, but still lets you play home-barista. Out of the box it’s a very easy-going, pressurised-basket machine… and with a couple of simple tweaks it can get surprisingly close to “real” home-barista territory.
Features
Type: Compact, semi-automatic traditional espresso machine
Pump: 15-bar vibration pump (no OPV)
Heating: Thermoblock
Baskets: Pressurised double & single baskets supplied
Steam wand: Panarello with “hot milk/cappuccino” selector (can be used as quasi-pro wand)
Cup clearance: Removable drip tray for taller cups
Hot water: Steam wand doubles as a hot water outlet
Adjustable brew temperature: 3 shot temp settings
Size & weight: Approx. 14.9 cm (W) × 33 cm (H) × 30.3 cm (D), 4.2 kg
Slim footprint: Perfect for tiny worktops and under-cabinet setups
My Observations
For the money, the Dedica is about as good as it gets if you want a small traditional espresso machine rather than a pod or bean-to-cup. Yes, it’s a 15-bar, thermoblock, pressurised-basket “domestic” machine – but it punches above its weight, especially once you understand what it is and how to get the best out of it.
Out of the box, it’s built to keep things simple: use pre-ground or coarser grinds, let the pressure baskets do the heavy lifting, and you’ll get “pretty decent” espresso-style shots with a relatively low learning curve. If you want to go further, the nice surprise is how easily it can be nudged into home-barista mode: swap in a standard basket (or a bottomless portafilter setup), pair it with a capable grinder, and you can genuinely start chasing proper espresso.
The other unexpectedly good bit is the Panarello. Usually, I’d tell you to rip these off and never look back, but with the Dedica, you can actually coax latte-art-worthy milk from it using the hot-milk / cappuccino selector, or just slide it off and treat the pipe as a basic steam wand. For a tiny, entry-level machine, that’s impressive.
My only real grumble is price at full RRP – at the top end, it feels a tad “spenny” for a thermoblock, 15-bar domestic machine. But it’s regularly discounted, and at that lower street price, it makes a lot more sense.
What I Like
Super slim footprint – genuinely tiny, ideal for small kitchens and cramped worktops
Great “starter” machine – easy to use with pressure baskets, but upgradable to standard baskets
Surprisingly capable steam – Panarello can do latte-art-worthy milk with the right technique
Adjustable shot temperature – rare at this price point
Hot water via the wand – handy for Americanos and long blacks
Easy to mod – bottomless portafilter / standard basket swap is straightforward
What I Like Less
Full-RRP pricing – at list price it feels a bit expensive for a basic 15-bar thermoblock
15-bar, no OPV – more prone to channeling; you have to be careful with puck prep once you “go serious”
Pressurised baskets by default – great for ease, but limit shot quality until you upgrade
No solenoid valve – wetter pucks, messier knock-outs compared to higher-end machines
Final Verdict, And Who Is the Dedica For?
If you’ve got limited space, a limited budget, and you want a “real” espresso machine rather than a pod or bean-to-cup, the De’Longhi Dedica EC685 is a brilliant shout. It’s slim, easy to live with, and will make perfectly drinkable cappuccinos and lattes out of the box – with the option to grow into it later with a better grinder and standard baskets.
It’s for people who like the idea of being a bit of a home barista, are happy to tinker a little (especially if they upgrade baskets and grinder), and need something compact and wallet-friendly.
It’s not for you if you want full push-button convenience (that’s bean-to-cup or pods), or if you’re already deep into light roasts, precise 9-bar extractions, and prosumer-level control – in that case, you’ll outgrow it very quickly and should be looking at machines like the Bambino, Gaggia Classic, or slim prosumer options instead. Read My De’Longhi Dedica EC685 Full review →
The Lelit Mara X is what happens when someone takes a classic E61 heat-exchanger machine, shrinks it down to “actually fits in a normal kitchen” size, and then gives it a brain. It’s a proper home-barista machine in a very slim suit, with temperature smarts that fix most of the usual HX faff.
Features
Type: E61-style heat exchanger espresso machine
Boiler: Stainless steel HX with double probe thermo-siphon system
Pump: Quiet Lelit X vibration pump with OPV set around 9 bar
Water tank: 2.5 L shared tank (same as Bianca)
Drip tray: ~0.8 L capacity
Dimensions:22 cm (W) × 41 cm (D) × 35.3 cm (H) – seriously slim for an E61
Optional: Flow-control paddle kit available for pressure profiling nerdiness
Why it wins: Because it gives you dual-boiler-like temperature stability and control in a tiny 22 cm-wide E61 machine, without the usual HX flushing circus.
My Observations
The first thing that hits you with the Mara X is how compact it is for what it is. Most E61 HX machines look and feel like they were designed to live on a café counter and only tolerate being in a kitchen. The Mara X feels like the opposite: properly chunky and premium, but genuinely sized for a normal worktop.
Lelit clearly hasn’t cheaped out on the important bits. The water tank, portafilter, and overall build feel very “Bianca-ish”, just in a slimmer chassis. Nothing looks like an afterthought or a cost-saving hack – no flimsy trays, no “recycled ice-cream tub” water tank vibes.
Where it really stands out is the way it handles temperature. The double probe system (one in the boiler, one in the HX) and the two modes completely change the typical HX experience. In coffee mode, it behaves more like a single boiler that just happens to have steam on tap – very stable, no constant flush-dancing. In steam mode, it leans more towards café-style workflow and can be “tricked” into feeling a bit dual-boiler-ish if you time your flush and steam correctly.
In the cup, it’s exactly what you’d expect from a solid, temp-stable E61 paired with a good grinder: it doesn’t magically give your beans superpowers, it just lets you get the best out of them consistently.
What I Like
Ridiculously slim for an E61 – 22 cm wide but still looks and feels substantial
HX without the drama – double probe + coffee/steam modes = far less flushing faff
Genuinely espresso-focused design – prioritises brew stability over gimmicks
Serious steaming – proper pro wand, great steam power for flat whites & latte art
Simple controls, smart behaviour – just a couple of switches, but very clever under the hood
Great value at this level – competes with pricier HX/dual boiler machines on performance
What I Like Less
E61 warm-up reality – you’re in 20–30 minute warm-up territory; not a “quick on/off” machine
Demands a good grinder – pairing this with a budget grinder would be a crime
No built-in shot timer/scheduling – you’ll likely want a smart plug and a separate scale
Not for tinker-phobes – it’s simple for an E61, but still more involved than a Bambino or Dedica
Final Verdict, And Who is the Mara X For?
The Lelit Mara X is made for home baristas who want “real machine” performance in a slim, kitchen-friendly footprint. If you’re happy with the E61 mindset (machine on a schedule, dialled-in workflow, proper grinder, good beans) and you want HX power with dual-boiler-ish stability, it’s a bit of a no-brainer at this price. Read My Lelit Mara X Full review →
It’s for people who:
Want café-quality espresso and milk drinks at home
Are ready to commit to a decent grinder and dialing-in
Need a narrow machine but don’t want to sacrifice capability
It’s not for you if:
You want fast heat-up and “on/off as you go” convenience
You’d rather press one button and let the machine think for you (bean-to-cup / pods)
You’re not interested in the home-barista hobby side at all
Sage Bambino & Bambino plus
Already interested in the Bambino or Bambino Plus? We’ve covered both of these compact machines in detail in our Manual Espresso Machines section. Jump back to our Bambino & Bambino Plus reviews.
Looking for a fully manual, electricity-free espresso experience that sits somewhere between pod machine convenience and traditional cafe-style extraction? The Rok Presso Smartshot claims to deliver true espresso, minimal faff, and planet-friendly operation wherever you take it.
With its spring-lever system and compatibility with pre-ground coffee, it’s a unique, hands-on contender for portable espresso fans who want to ditch capsules but aren’t ready to dive deep into grinder upgrades or barista-level skills.
Features
No electricity required, manual, lever-powered espresso extraction
Uses pressurized filter baskets, works with pre-ground coffee of varying grind sizes
Size: 20cm wide (up to 61cm during use), 31.5cm tall (51cm with levers up)
High-strength glass-composite polymer body and cast aluminium levers
Stainless steel 51mm portafilter with wooden handle
Pressurized double-shot basket (compatible with espresso or cafetiere grind)
Internal drip tray, though compact
Brew chamber capacity: 75ml
Lightweight and travel-friendly build
My Observations
First off, the Rok Smartshot makes a big statement with its looks. It’s lightweight, stylish, and quite compact for stowing, perfect for the countertop or even an odd camping trip. Just don’t be fooled into thinking it’s tiny in use: you’ll need a solid two feet of counter space to actually pull a shot with those swooping lever arms.
Now, let’s talk workflow. The Rok claims you can use anything from espresso-fine to cafetiere-coarse coffee. Technically, yes, but my tests showed there’s a big difference: stick to espresso pre-ground for the best results, otherwise you’ll end up with thin, uninspiring brews. When you use good espresso ground, this thing does beat pod machines on flavour and mouthfeel, it’s genuine espresso, not just “coffee-like” as you get with many pods.
Convenience? Well, it’s easy, but not “push-button” easy. You’ll be boiling water, pre-heating, loading grounds, and cleaning up a bit of a mess. Anyone who has moved on from pods to real espresso will probably accept the extra steps, but be warned, this isn’t instant coffee at the press of a button.
Temperature is another quirk. Straight out of the box, the shots aren’t especially hot: expect mid-to-high 50s °C unless you do a heat flush and move fast. For neat espresso sippers, you’ll need to work to get that ideal temp; for milky drinks or Americanos, hot enough is usually good enough.
What I Like
Compact and lightweight for travel and easy storage
Stylish design: good-looking mix of black, silver, and wood accents
Fully manual operation: needs no electricity
Pressurized basket means it works well with supermarket pre-ground coffee (if you stick to espresso grind)
Cheaper per-cup cost than pods
Satisfying, hands-on lever action with the spring-assist system
What I Like Less
Actual counter space needed in use is huge for such a compact machine
Messy workflow: spills and cleanup are frequent, especially due to the ridged exterior
Temperature is on the low side unless you pre-heat and hustle
No milk frothing or hot water functions
Plastic splitter for splitting shots is fiddly and keeps falling off
Not as convenient as advertised versus pod machines
Final Verdict and Who Is This Machine For?
The Rok Presso Smartshot is a niche but charming choice, brilliant if you’re craving real espresso without being tied to a socket or fancy gadgets. If you want to save money over pods, travel with quality in your backpack, or simply enjoy hands-on process, this is for you, so long as you can live with a bit of mess and the need to work for a hot shot.
Skip it if you’re after true convenience, prefer steaming milk, or want a very small footprint during actual brewing. For most easy-drink home espresso setups, compact pump machines like the DeLonghi Stilosa or Dedica are easier, neater, and more versatile. If your heart is set on pure portability, even the Wacaco Minipresso GR2 edges out the Rok for size and travel-chumminess.
If you want true espresso anywhere, in the hills, at the beach, or even just in a hotel room, the Wacaco Picopresso just might be the hand-powered hero you’re after. It’s about as small as a travel espresso maker gets, yet it’s capable of giving you genuinely impressive, café-style shots (as long as you’re willing to do a little tinkering and bring a good grinder along for the ride). In my experience, it’s not just functional; it’s genuinely fun, making a brilliant gift.
Features
Tiny, all-in-one espresso maker designed specifically for travel
Requires no electricity: fully hand-pumped extraction
Uses up to 18g ground coffee for proper double shots
Supports standard 1:2 espresso ratios and professional style puck prep
Heavily customisable: use with various espresso grind sizes and tampers
Nearly every part packs away inside for transport (seriously neat)
Easy to rinse and clean
Built from sturdy, hard plastics and metal parts
Dimensions: palm-sized about 10.5cm tall, 7.8cm diameter
My Observations
I’ll be honest, the Picopresso was a lot of fun to unbox. It comes in a travel case, feels premium, and practically screams “gift potential.” (For the record, I bought this one for my son, who’s a barista and outdoors nut, and then borrowed it straight back for this test. Cheers, Josh!)
This little thing surprised me: the espresso quality is honestly cracking, especially for a travel device. I was able to dose 18g just like you would with a high-end home kit, and with a good grind (the Aergrind worked fine for me), I could pull a lovely shot at a 1:2 ratio. That’s not something you can say about most “portable espresso” gadgets. The only trick is heat. Expect a little trial and error: you’ll want to preheat the Picopresso thoroughly and work quickly to keep things hot; otherwise, you’ll find you’re making cold, underextracted shots, and nobody wants that, not even at the top of a mountain.
Another win: the entire setup fits into itself for travel. It’s way more portable than something like the Rok Smartshot, and every part feels like it’s made to survive being shoved in a rucksack. Shot-making is hands-on and satisfying, but be warned: you’ll need a decent espresso grinder to get the most out of it, and you may get the odd unexpected “spurter” from the bottomless portafilter (ask my eyeball for details).
With a little practice on routine and temperature, the Picopresso completely nails that “real espresso, anywhere” brief. It’s not just for the novelty, it’s for serious espresso lovers who know that great coffee comes with a little process and care.
What I Like
Absolutely tiny footprint and brilliant for travel
Impressive, true espresso quality, rivaling much larger (and pricier) machines
Satisfying to use: makes you feel like a proper coffee botherer even outdoors
Fantastic unboxing/packaging, and makes an excellent gift
Everything packs up inside the unit
Cleans up easily
What I Like Less
Needs a quality espresso grinder (café-fine grind required)
Routine takes a little practice, especially getting the pre-heating and workflow right
Espresso temperature can be an issue if you don’t pre-heat properly
Bottomless portafilter design means you may encounter a messy “spritz” if your prep isn’t spot-on
Final Verdict and Who Is This Machine For?
The Wacaco Picopresso is perfect for anyone who wants “proper” espresso absolutely anywhere, but is happy to put in a little work. It’s a dream for outdoorsy types, frequent travelers, vanlifers, or coffee nerds who simply can’t bear the thought of a bland instant brew when off the grid. Pair it with a solid portable grinder and some decent beans, and you’re sorted.
If you want simple, push-button brewing, or if you only have supermarket pre-ground, this may not be your speed. But if you crave real espresso and appreciate a ritual (even in a tent), the Picopresso is the tiny titan you’ve been looking for.
Great Espresso at Home: Dos & Don'ts
Espresso jargon & what to look for in an espresso machine
Not sure what a PID is, what “9 bar” actually means, or why everyone’s obsessed with portafilter sizes? Don’t worry, you’re not alone. When you first get into the world of home espresso, all the jargon and features can sound like a foreign language invented by coffee nerds (guilty as charged). This quick guide is here so you don’t get lost in the lingo.
Below you’ll find easy explanations of all the terms and acronyms you'll see in my reviews, along with why they actually matter. Brew on!
PID (Proportional-Integral-Derivative controller)
What it is: A digital controller (like an advanced thermostat) that keeps the water temperature steady as close to the set temperature as possible.
Why it matters: Consistent water temperature is key for pulling great-tasting espresso shot after shot, especially if you’re using lighter roasts or want café-quality results.
9 Bar OPV (Over Pressure Valve)
What it is: A valve that regulates the pressure delivered to the coffee puck, capping it at the ideal 9 bars (rather than the “15-bar” the box might claim).
Why it matters: Brewing above 9 bars usually leads to bitter, over-extracted shots or a messy puck. A 9 bar OPV means your espresso is less likely to taste weird, and it’s easier to dial in.
Portafilter Size (e.g., 51mm, 54mm, 58mm)
What it is: The diameter of the filter handle that holds your coffee grounds.
Why it matters: 58mm is the commercial “standard” (more upgrade options and accessories), many home machines have 51mm/53mm portafilters, most Sage portafilters are 54mm (plenty of accessories available due to the popularity of Sage machines)
Baskets: Pressurised vs. Non-Pressurised (Single-Wall/Double-Wall)
What it is:
Pressurised baskets allow you to use pre-ground coffee and still get crema by increasing back pressure.
Non-pressurised (standard/single-wall) baskets require fresh, finely ground beans and a good grinder, but unlock better espresso potential.
Why it matters: Pressurised is easier but “cheats” on the crema; non-pressurised is best for café-level espresso, but with a steeper learning curve.
Thermoblock vs. Boiler vs. Dual Boiler
What it is: The heating system for water and steam.
Thermoblock: Heats water on-demand.
Single boiler: One tank for both brewing and steaming, but not at the same time.
Dual boiler: Two separate tanks for simultaneous brewing and steaming.
Why it matters: Dual boilers mean you can brew espresso and steam milk at once with precise control; single boiler is fine for most, but you need to wait between brewing and steaming; thermoblocks heat up quickly but often struggle for consistency.
Pre-infusion
What it is: A gentle trickle of water soaks the coffee puck before full pressure is applied.
Why it matters: Reduces channeling and helps extract sweeter, fuller espresso, especially useful with freshly ground beans.
Steam Wand: Panarello vs. Pro Wand
What it is:
Panarello: Auto-frothing tip for easy, foamy milk, often with less control.
Pro wand: Barista-style tip, needs practice, but lets you texture milk for latte art or silky flat whites.
Why it matters: If you want true café milk, the pro wand has the edge, but a Panarello is more “plug and play”.
Solenoid Valve (3-Way Valve)
What it is: Releases pressure and drains remaining water after brewing.
Why it matters: Results in drier coffee pucks (less messy knockouts) and prevents messy spurts or “portafilter sneeze”.
Integrated Grinder
What it is: Built-in bean grinder (burr is best, not blade).
Why it matters: Freshly ground beans make far better coffee. Bean-to-cup and some “in-between” machines have this for convenience.
Pressure (Bar)
What it is: The force used to push water through the coffee puck, usually advertised as “15 bar” or more.
Why it matters: Real espresso is best at 9 bars. Numbers higher are just marketing, look for machines that limit to 9 bars for authenticity.
Flow Control / Pressure Profiling
What it is: Lets you control the flow or pressure of water throughout the shot (e.g. Lelit Bianca paddle).
Why it matters: Gives huge scope for nerdiness and lets you dial in different beans to perfection, but is overkill for beginners.
Shot Timer
What it is: A Digital clock or timer tracking how long your espresso shot takes.
Why it matters: Vital for dialing in recipes and getting consistent results shot-to-shot.
Bypass Chute
What it is: An extra opening on bean-to-cup machines for adding pre-ground coffee (e.g. decaf).
Why it matters: It lets you use pre-ground or decaf occasionally without emptying the main bean hopper.
Quality Beans = Quality Espresso
Here’s the unsung truth of home espresso: even if you drop a small fortune on shiny machinery and top-shelf gadgets, you absolutely cannot outsmart a bad bean. I see it all the time, someone’s built the espresso equivalent of a NASA mission control centre in their kitchen, only to chuck in a bag of supermarket pre-ground that’s been sitting on the shelf since the Queen’s Jubilee.
Don’t be “that guy.” The single biggest upgrade for your coffee, hands down, is nabbing genuinely fresh, well-roasted beans. Start with good beans, and even the most basic setup will surprise you; start with stale beans, and not even a GS3 will save your shot.
And not to toot my own horn, but I will, because it’s my article, you can grab some top-notch, freshly roasted beans from my gang over at cworks.co.uk. We’ve got everything from the crowd-pleasing, forgiving-as-your-nan's-trifle Chocolate Brownie Blend (seriously, it’s the best-selling bean online) to wild light-roast single origins that’ll absolutely make your inner coffee scientist very happy.
All roasted to order, very affordable, and delivered with free next-day shipping. So you can go from “bean is bean” to “yes, THIS is espresso” in about 24 hours. Go on, treat your machine, try a bag, and let me know what you think!
Quality Grinder = Quality Espresso
Let’s set something straight: top-quality beans and a shiny espresso machine alone are NOT the magic formula for café-level coffee. The real linchpin in this mad espresso equation is the grinder. Yep, your grinder is where all those dreams of thick crema and rich, balanced shots either come to life or go to die. I see so many folks buy a brilliant machine, then pair it with a bargain-basement grinder that would struggle to crush cornflakes. It’s like putting budget tyres on a Ferrari; completely missing the point.
If you’re going down the manual espresso rabbit hole (machines with separate grinders), I'd highly recommend not cutting corners on the grinder. As a rule of thumb, a great grinder is the single most important espresso upgrade after beans. See my top recommendations regardless of the espresso machine you're pairing with.
Bottom line: if you invest in great beans and a solid espresso machine, make sure your grinder is up to the job, otherwise, you’ll never see (or taste!) what your setup can actually do.
Best Espresso Machines FAQs
So, we’ve made it all the way through, nice work! If you’re still feeling a bit lost in espresso machine land, don’t worry. It’s a lot to take in, and decision fatigue can hit hard if you’re anything like me. If you have any specific questions, feel free to drop me an email. But here are the answers to the most common ones I get:
Q: What is the best espresso machine?
A: Honestly, there’s no single “best” espresso machine. It’s like asking what the best car is: It completely depends on your needs. The best espresso machine for you is the one that fits your preferences, your budget, your kitchen, and your lifestyle.
If you've read the guide above, hopefully you’ve got a better idea of which type of espresso machine suits you. From there, it’s just a matter of choosing the model that ticks the most boxes for you.
Q: How do I choose the best espresso machine?
A: It all starts with understanding the different types of espresso machines. Are you after a traditional setup with full control? Or something fully automatic that does everything for you at the push of a button?
Once you’ve figured out which category suits you best (manual, integrated grinder, fully assisted, bean-to-cup, etc.), you can compare models within your budget and look for the ones whose pros match your needs and whose cons don’t bother you too much.
Q: What makes a good home espresso machine?
A: A good home espresso machine is simply one that fits you. That might sound vague, but the biggest mistake people make is buying a machine that looks the part or is highly rated… but isn’t the right match for how they want to make coffee.
Think of it like buying a manual car when you can only drive an automatic, probably not ideal! Espresso machines are no different. Know what you need, match that with your budget, and pick a machine that helps you enjoy making coffee rather than getting frustrated with it.
Q: What is a bean-to-cup espresso machine?
A: A bean-to-cup machine is basically an all-in-one espresso solution. It has a built-in grinder, and it pulls the shot for you without a portafilter or much prep on your part.
Some bean-to-cup machines are fully automatic, meaning you press a single button and it grinds the beans, pulls the shot, froths the milk, and pours the drink, almost like a mini vending machine. Others come with steam wands, which means you’ll froth the milk yourself after the espresso is made. Great for convenience, but often with some trade-off in cup quality compared to manual setups.
Q: How important is the grinder for home espresso machines?
A: Very. In fact, the grinder is arguably the most important factor in achieving great espresso.
If you’re moving away from entry-level machines and starting to care more about quality and consistency, your grinder becomes more important than the machine itself. You can get great shots from a modest espresso machine paired with a top-tier grinder, but not vice versa.
To use a car analogy: putting a cheap grinder on a premium espresso machine is like filling a sports car with low-grade petrol. It’ll run, but you won’t get anywhere near its true potential.
See my video on the importance of grinding your own beans:
By: ijwt Title: Best Espresso Machine UK 2025: Manual, Bean-to-Cup, Pod & Budget Picks Sourced From: coffeeblog.co.uk/best-espresso-machine/ Published Date: Sat, 06 Dec 2025 18:57:55 +0000